
How to Enable 2-Step Verification for Call of Duty
![]() by Kevin Archer·Updated 01 Oct 2024·7 minutes to read
by Kevin Archer·Updated 01 Oct 2024·7 minutes to read
Download Authenticator App
Before you can set up 2-Step Verification for your Call of Duty account you'll need to download Call of Duty Authenticator App on your device by searching for it in your Apple device's App Store or click on the button below Download on the App Store.
These simple steps will add an extra layer of security to your Call of Duty account.
Locate 2FA Settings
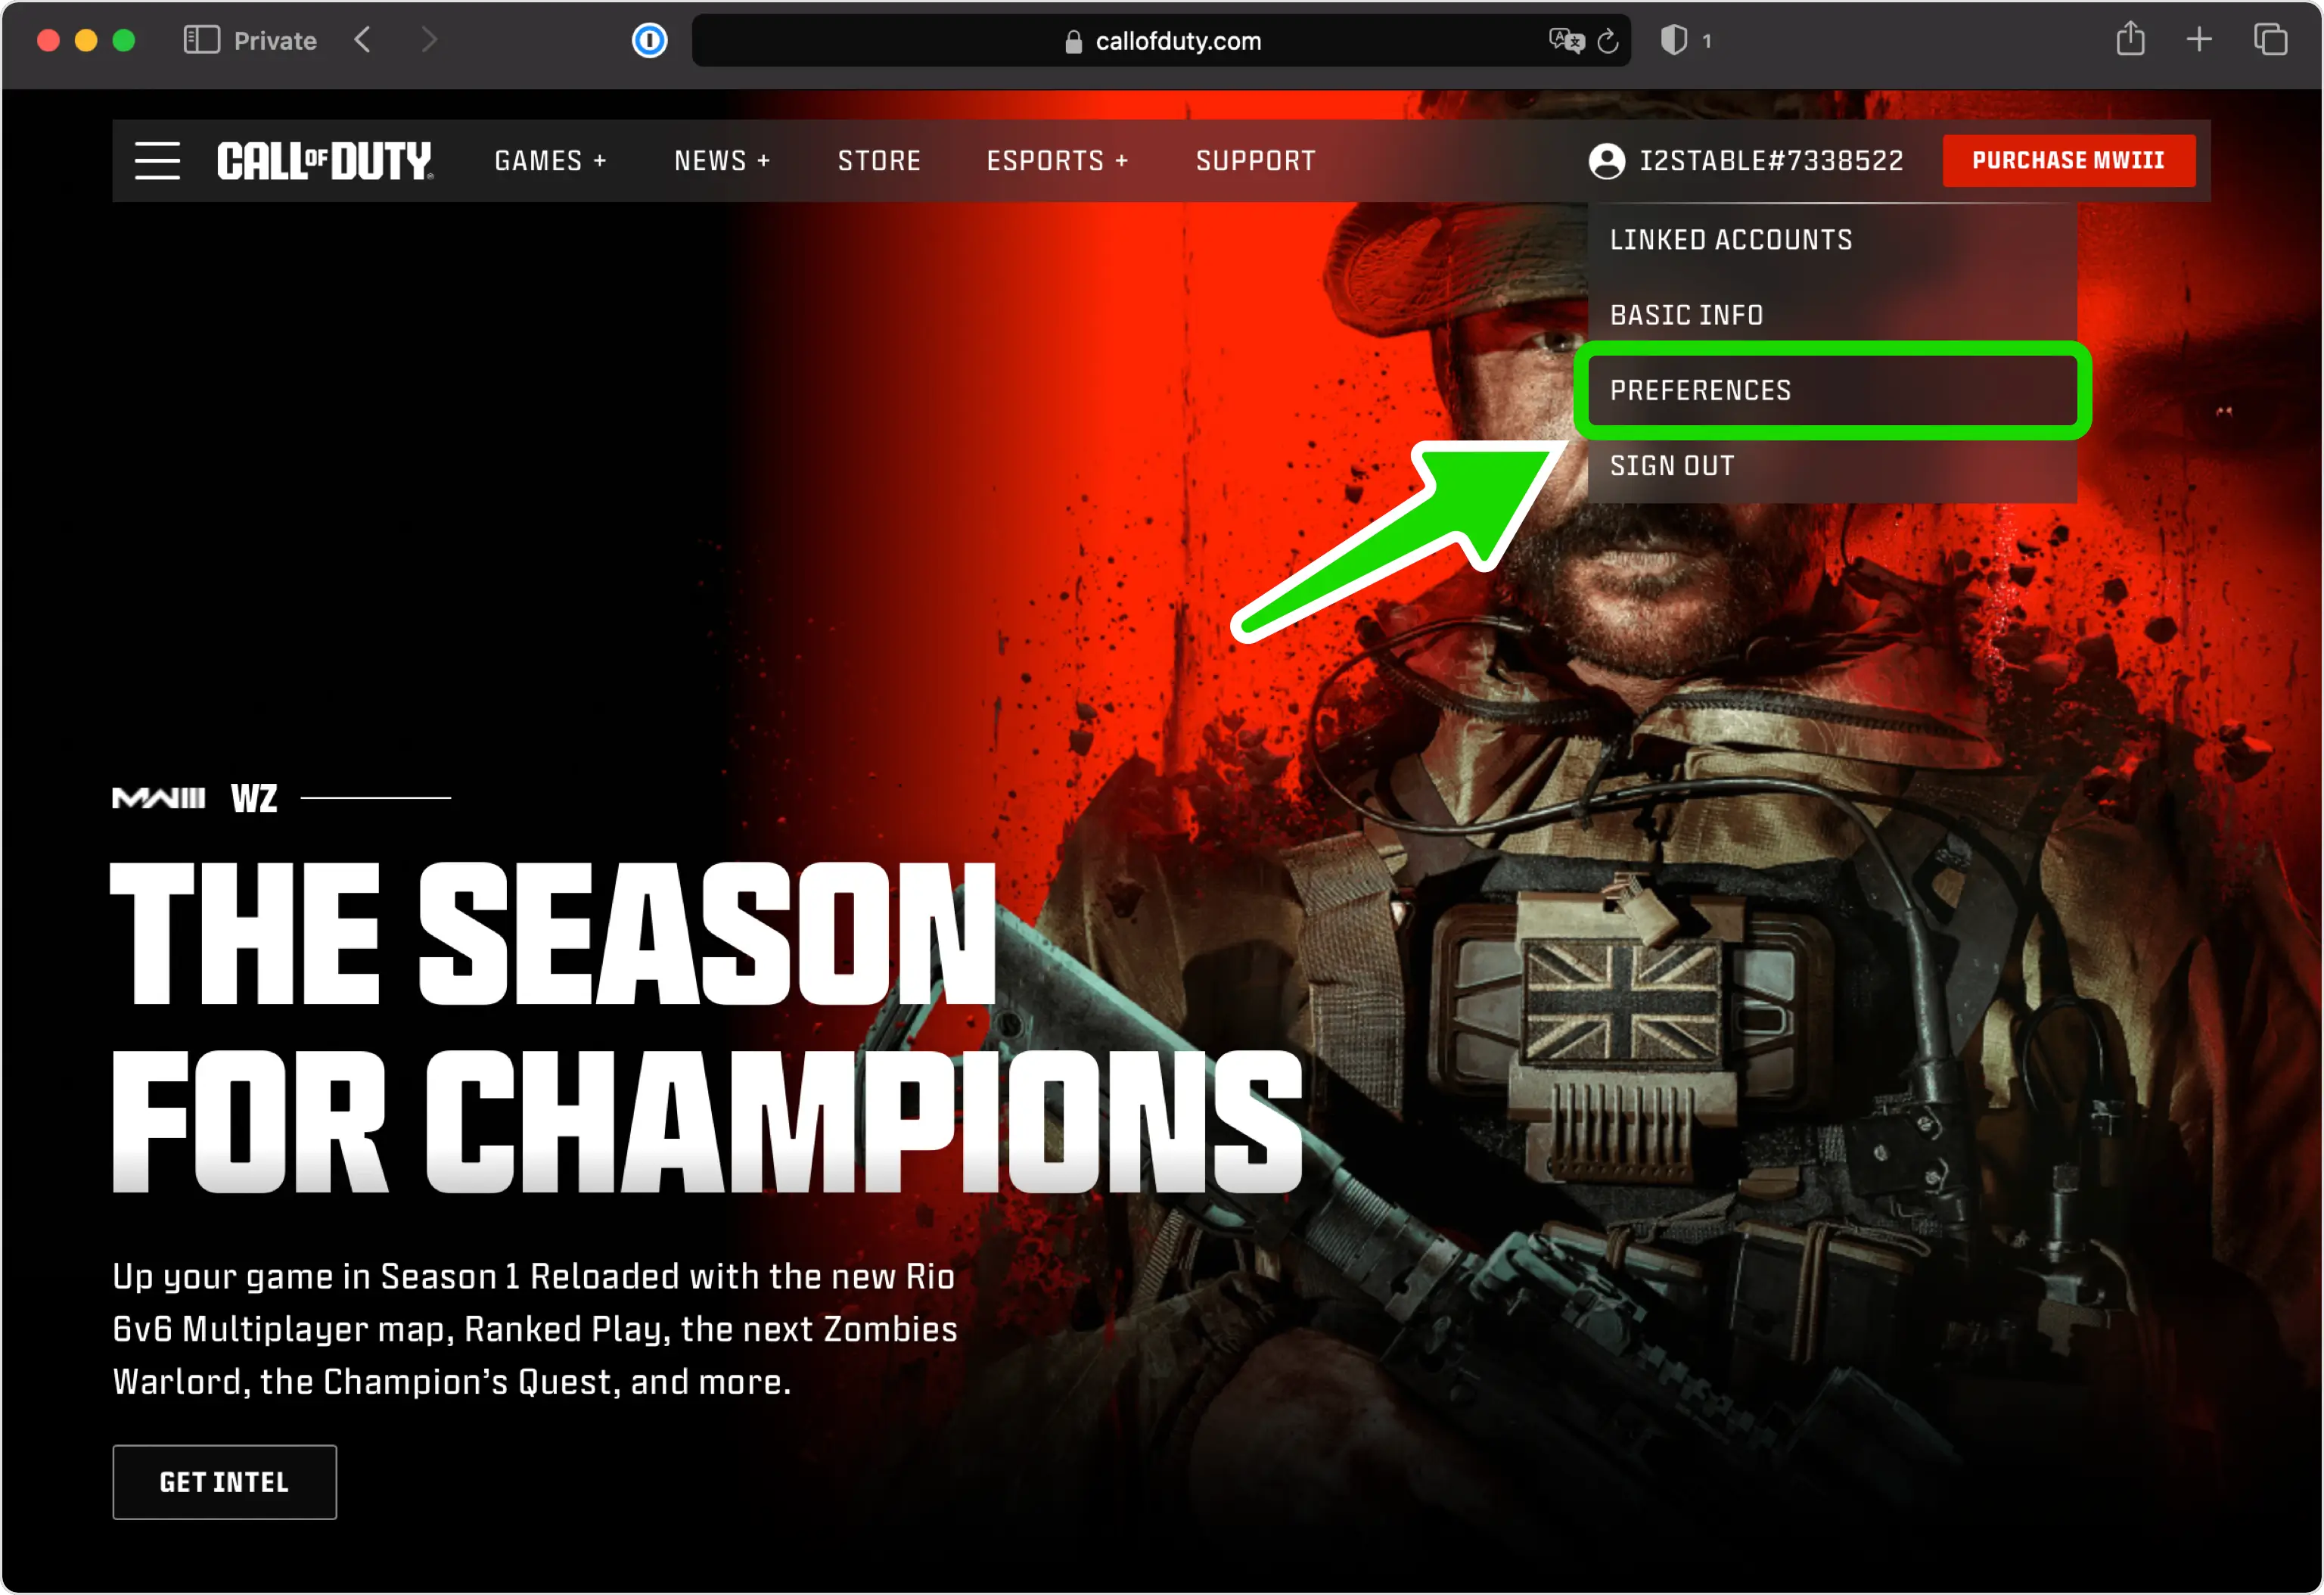
Sign in to your Call of Duty account. Click on your profile picture to reveal a dropdown menu. In the menu, look for and select the option labeled PREFERENCES
Privacy & Security
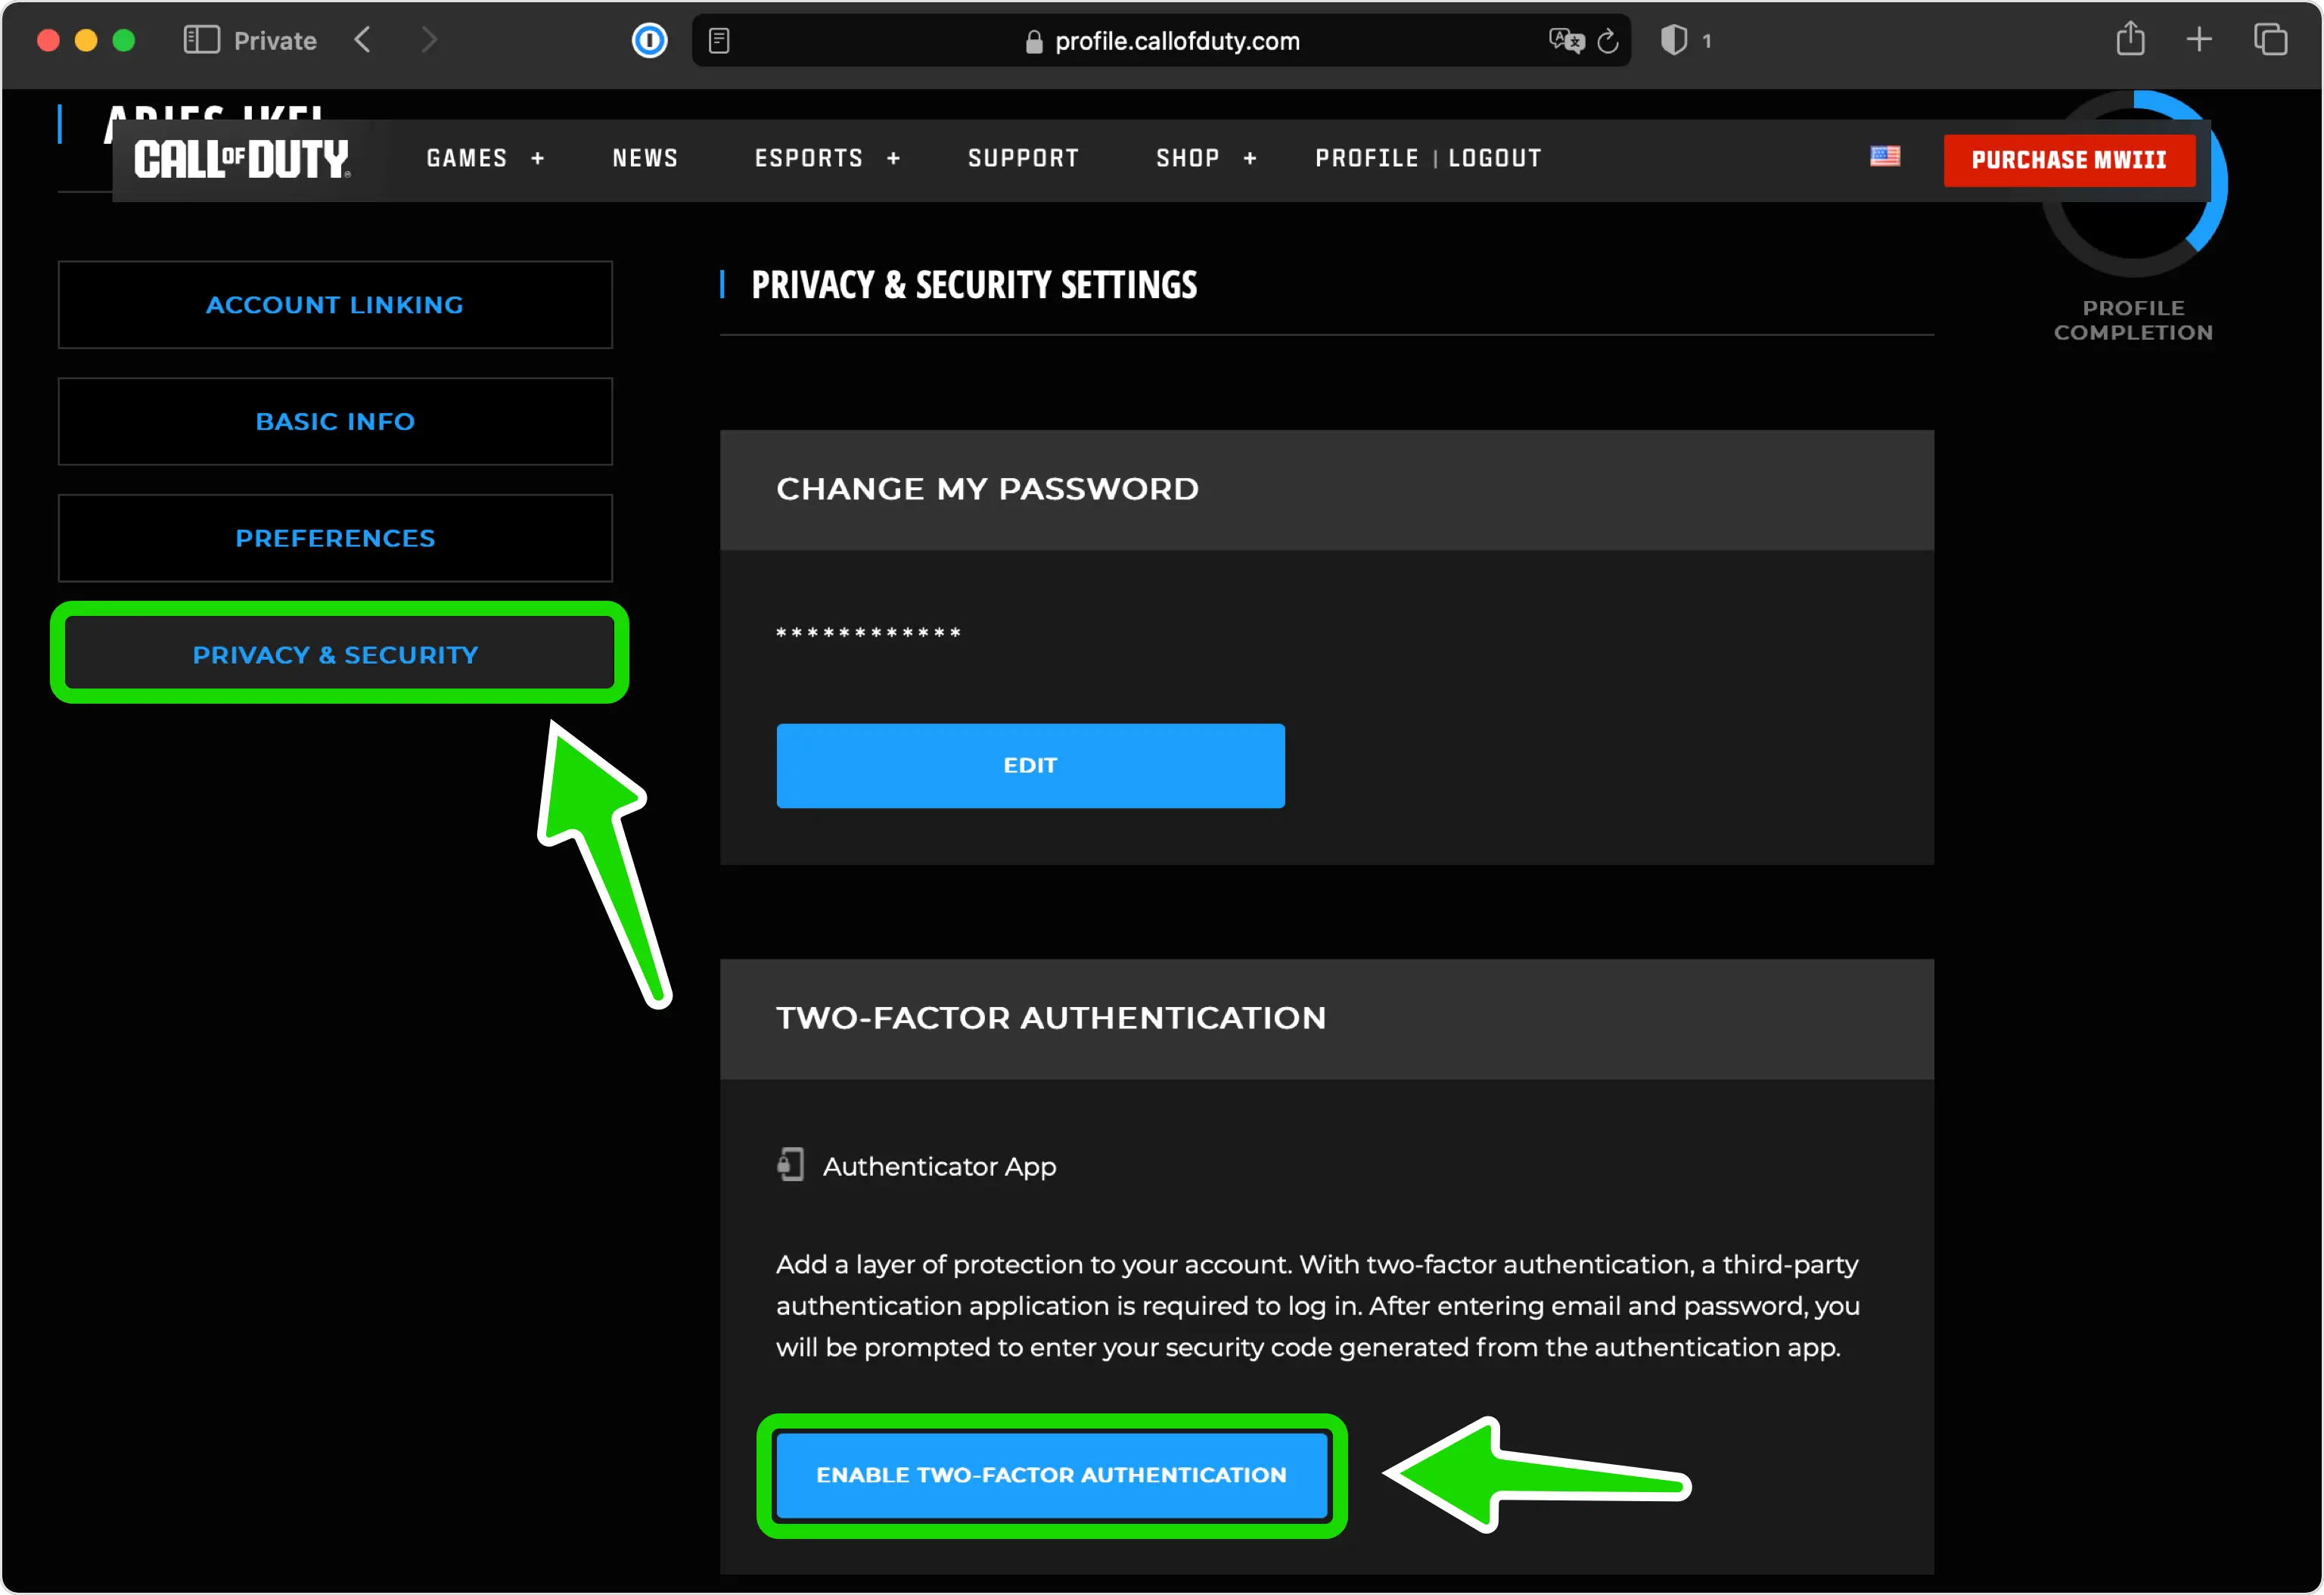
Navigate to the PRIVACY & SECURITY section. Scroll down until you find the TWO-FACTOR AUTHENTICATION option, then click on ENABLE TWO-FACTOR AUTHENTICATION
Verify Account by Email
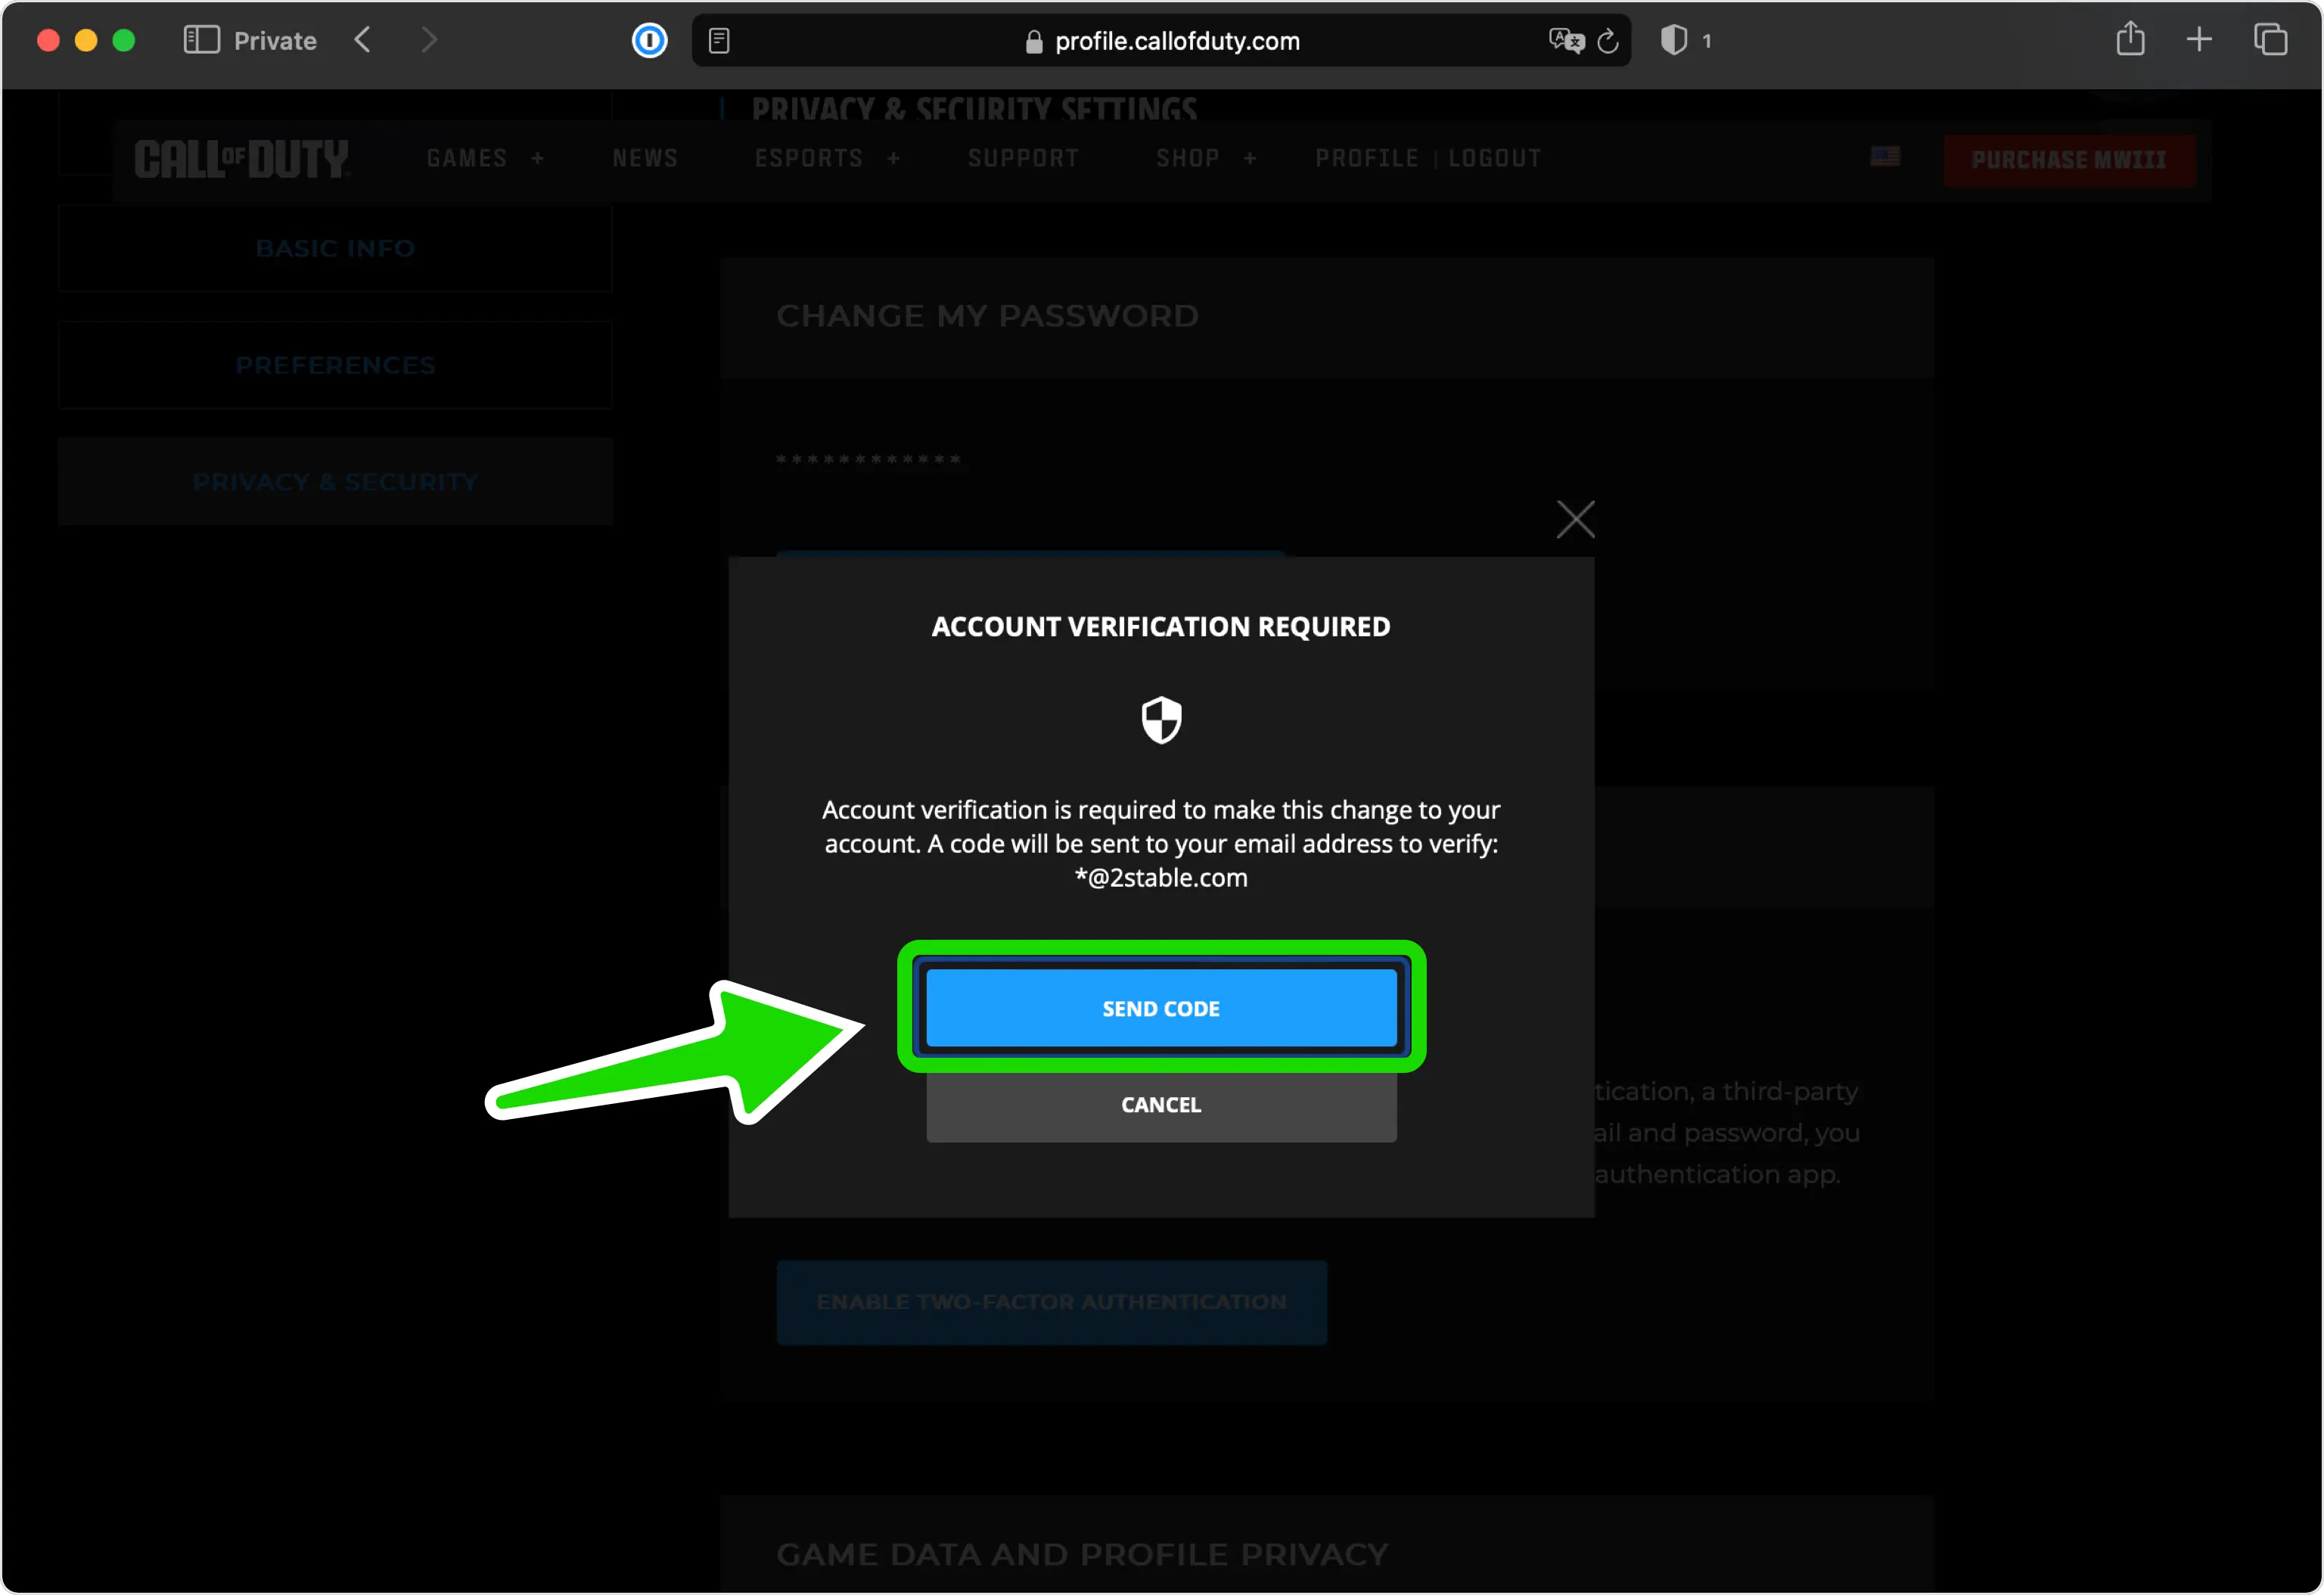
Call of Duty will send an alphanumeric code to your email. You'll need to enter this code in the next step.
Confirm Your Account
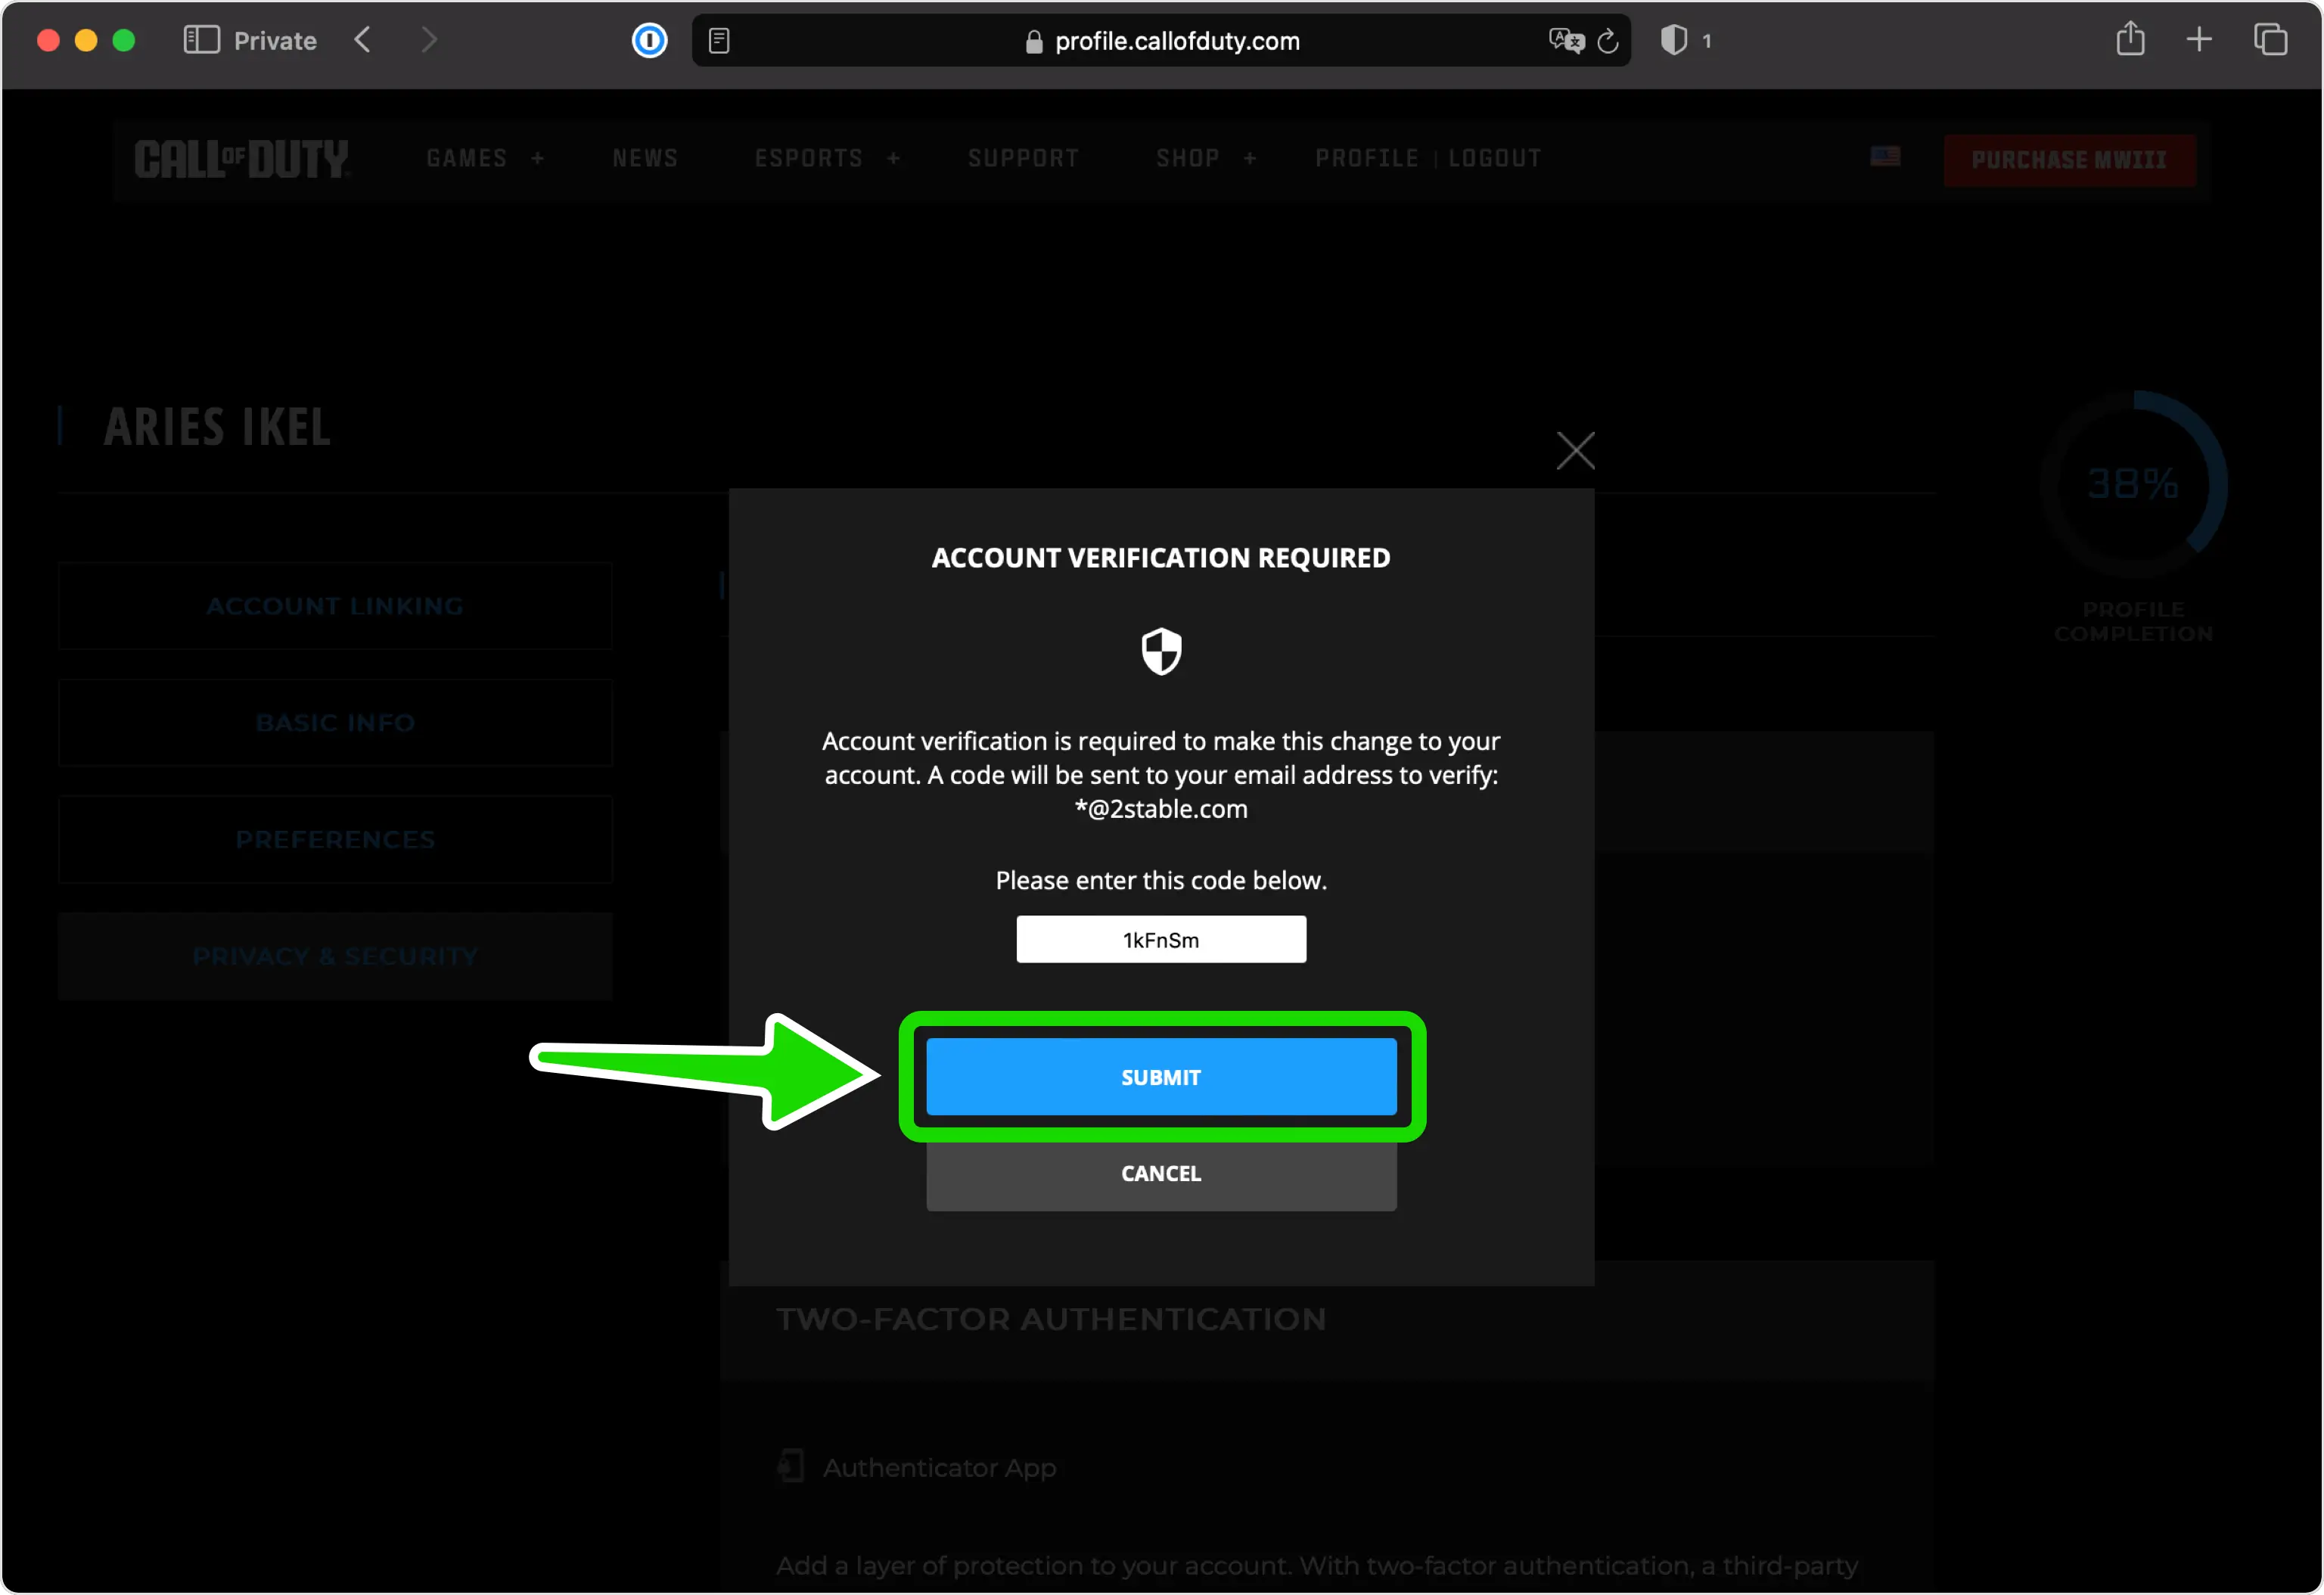
To confirm your account, enter the alphanumeric code sent to your email.
Two Factor Authentication QR Code
In this step, you will encounter a QR Code displaying the secret key required for setup. Open your Authenticator App and scan the QR Code. Remember to keep the page open during this process.
Note: Do not scan the DEMO QR Code shown below.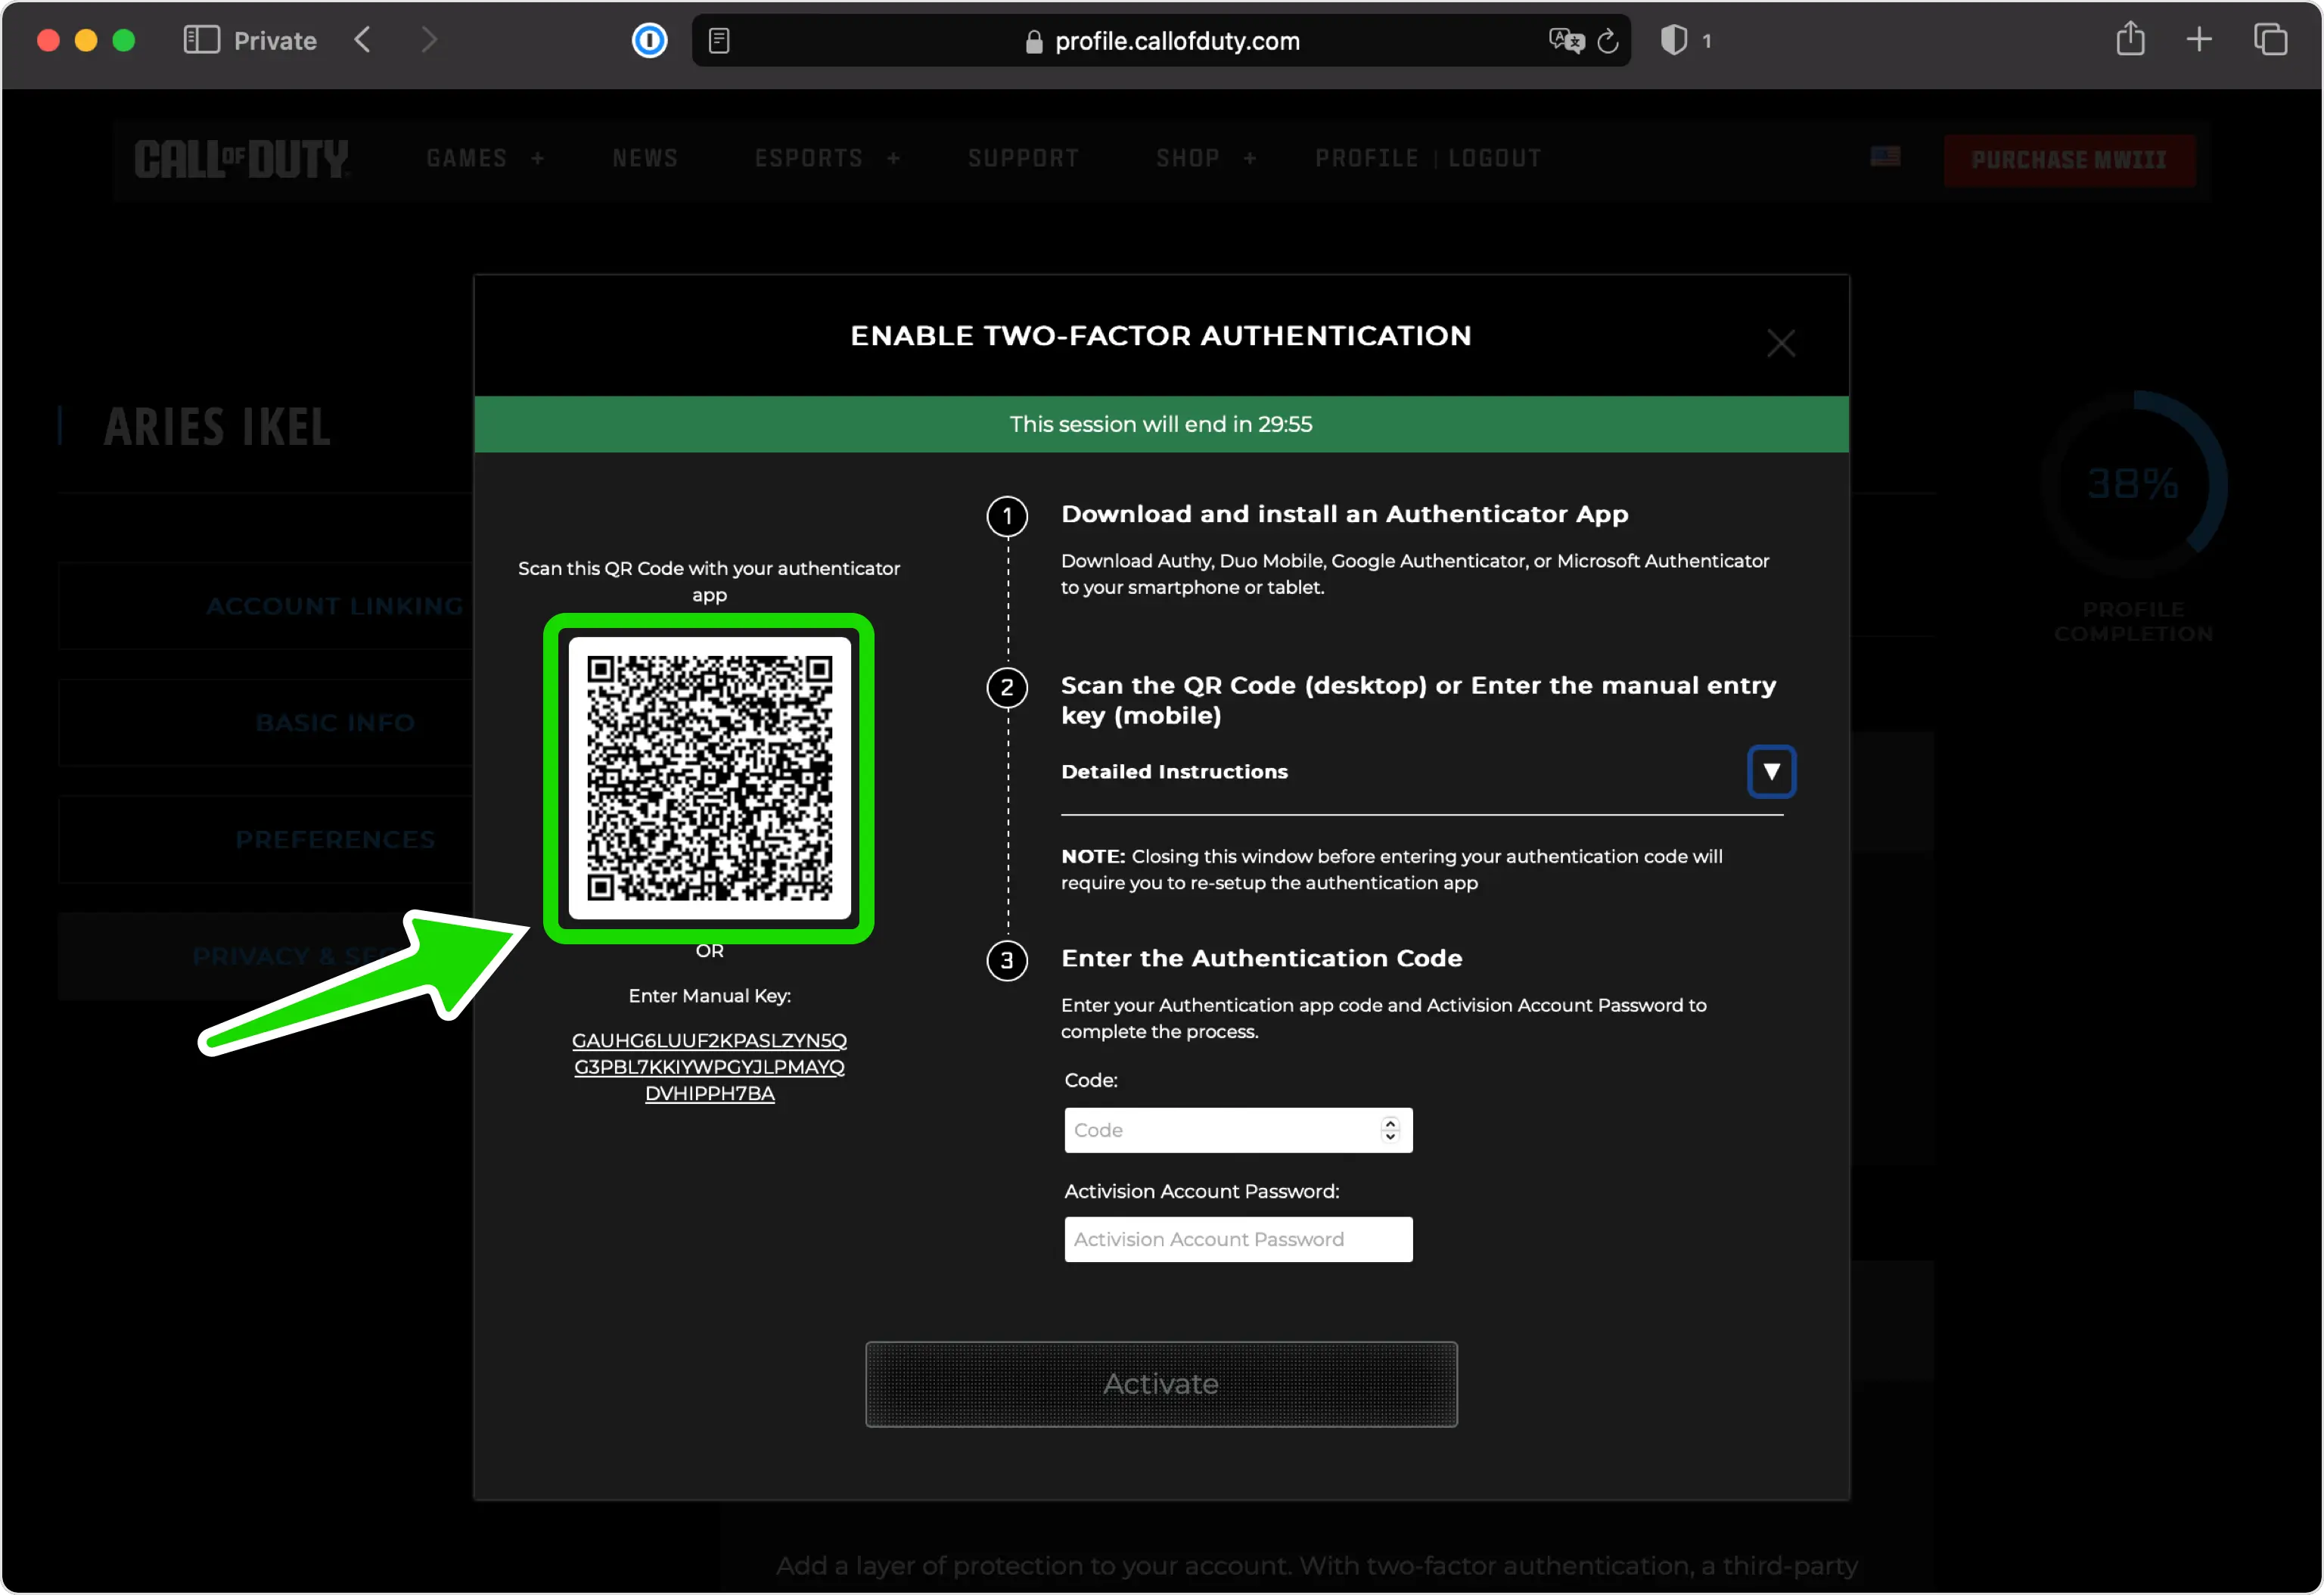
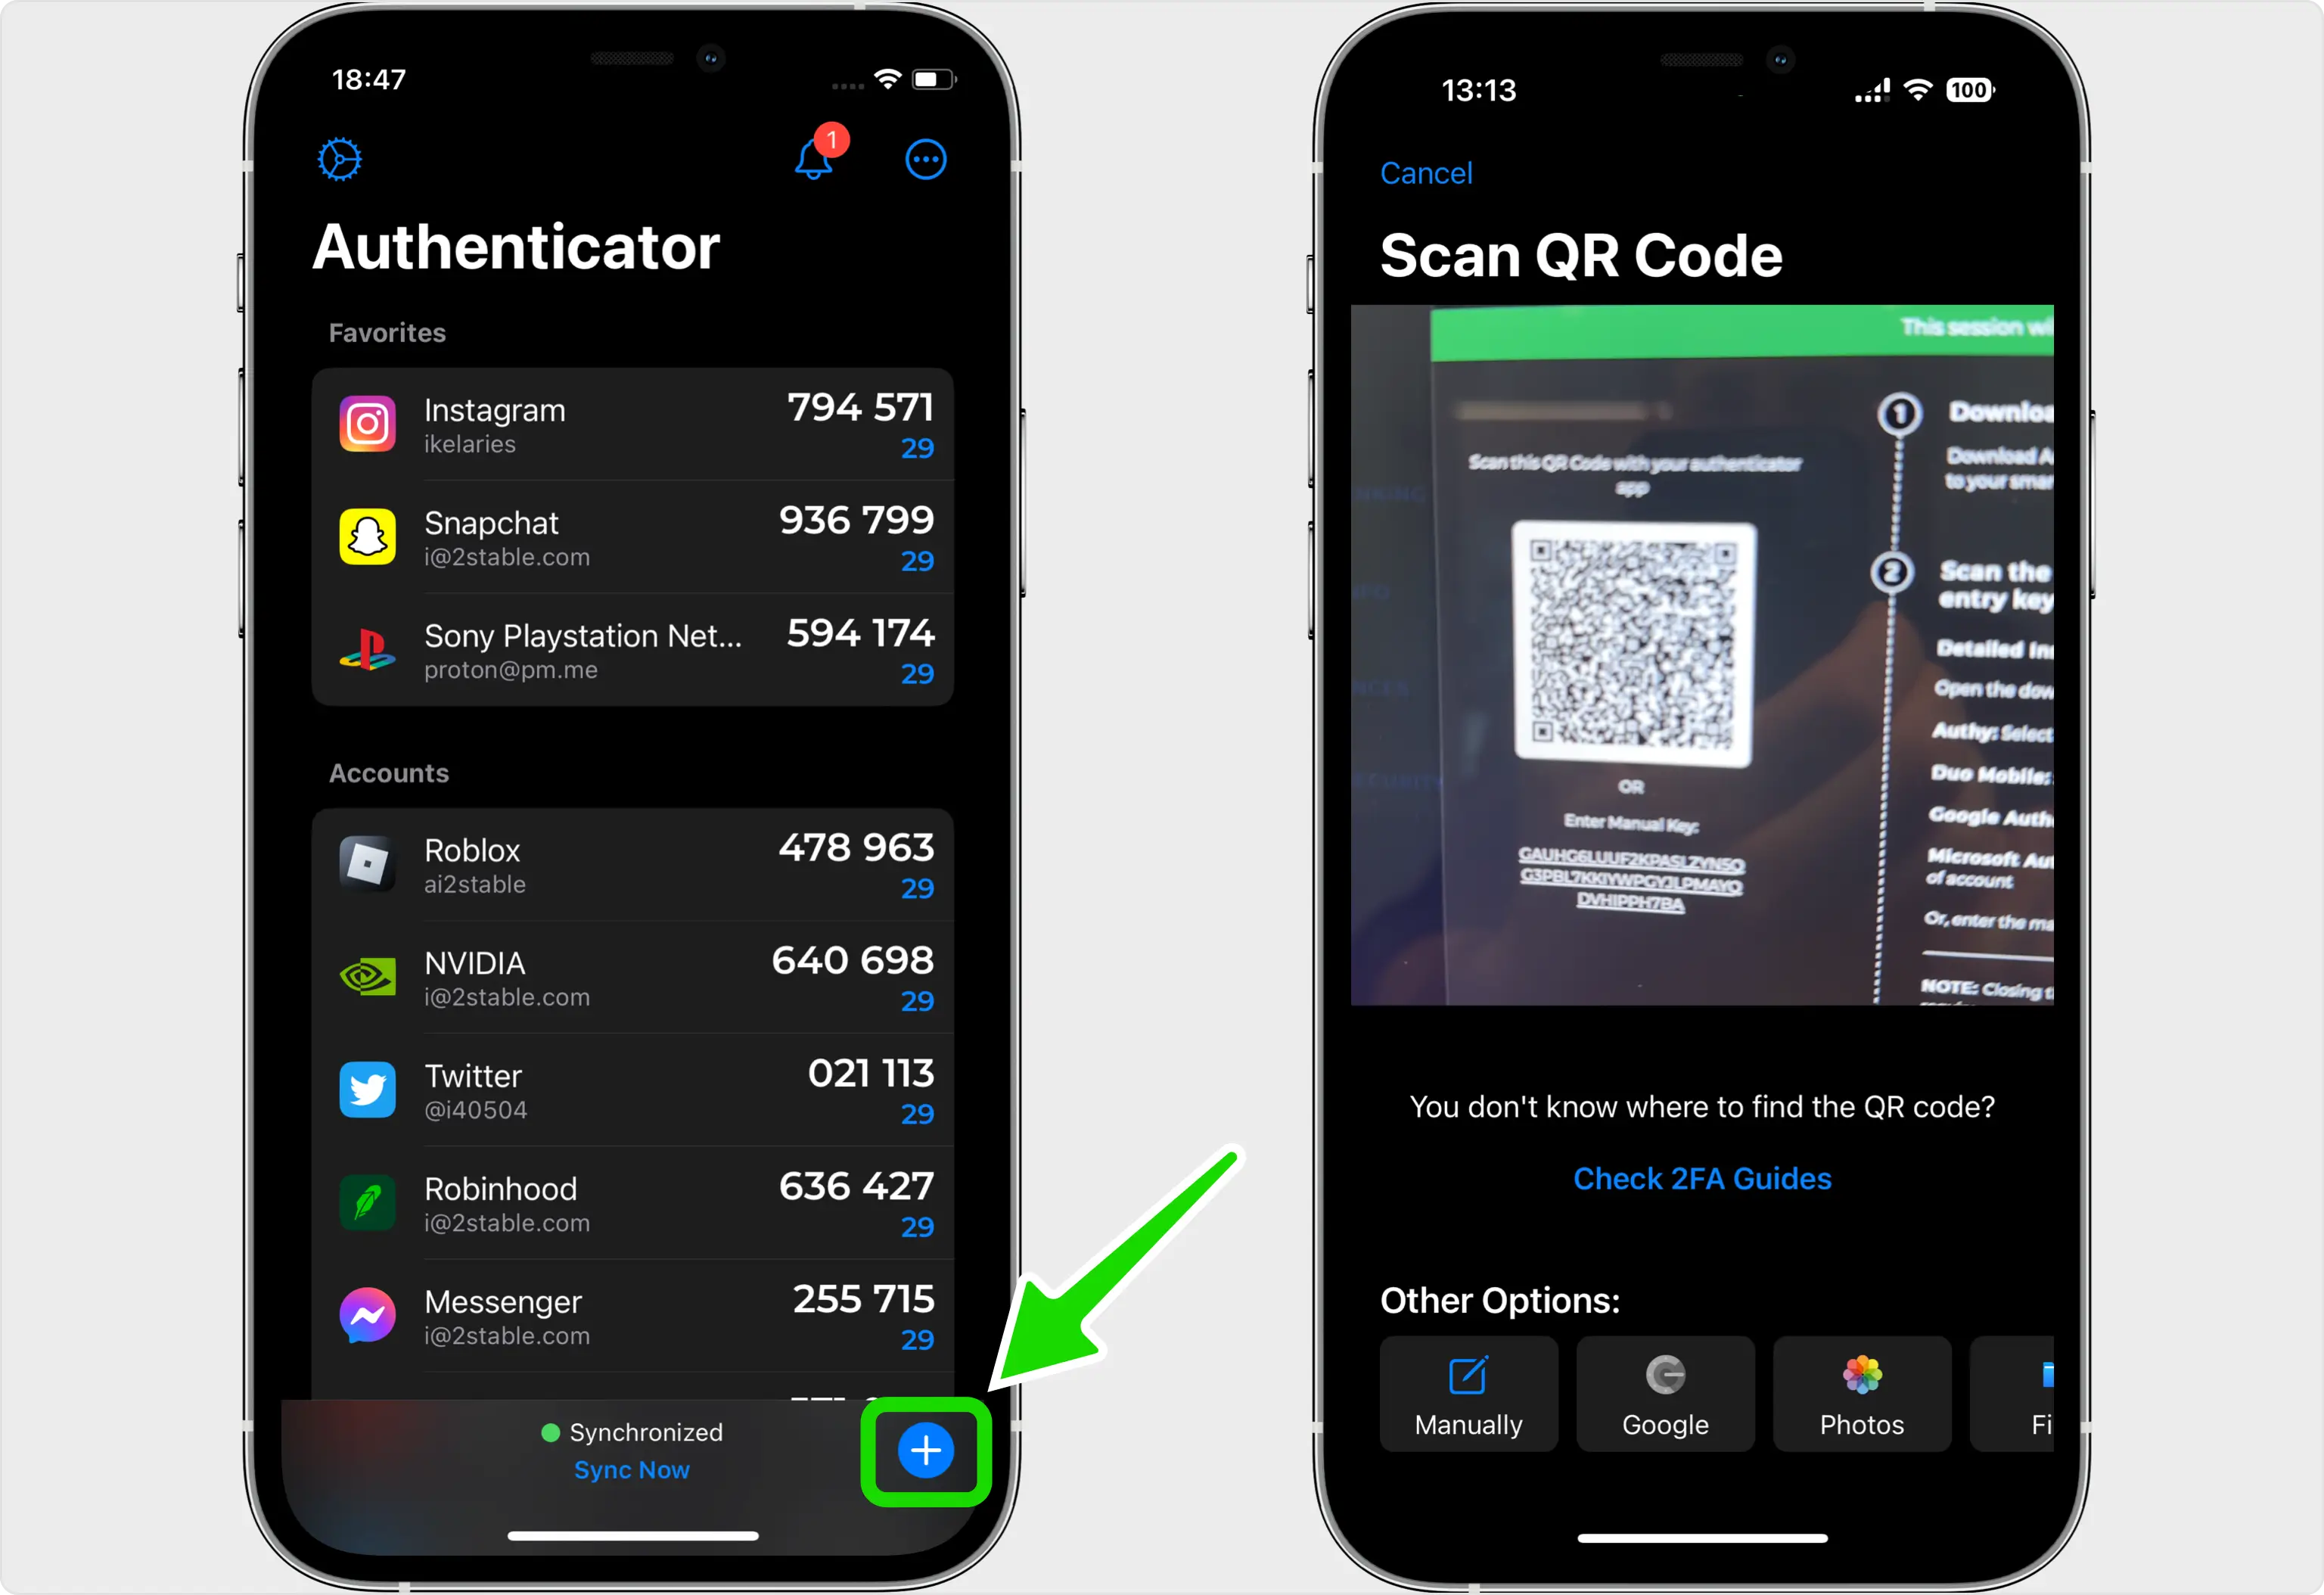
Capture QR Code
Open your Authenticator App, tap the plus
 button, and then hold your device up to the computer screen to scan the QR Code displayed on the Call of Duty web page.
2FA Verification Code
Once you've successfully scanned the QR Code provided by Call of Duty, the Authenticator App will automatically select the Call of Duty logo and fill in the account name and secret key. Click on Save when you're ready to proceed.
Tip: Customize the account icon by pressing on the icon.
icon.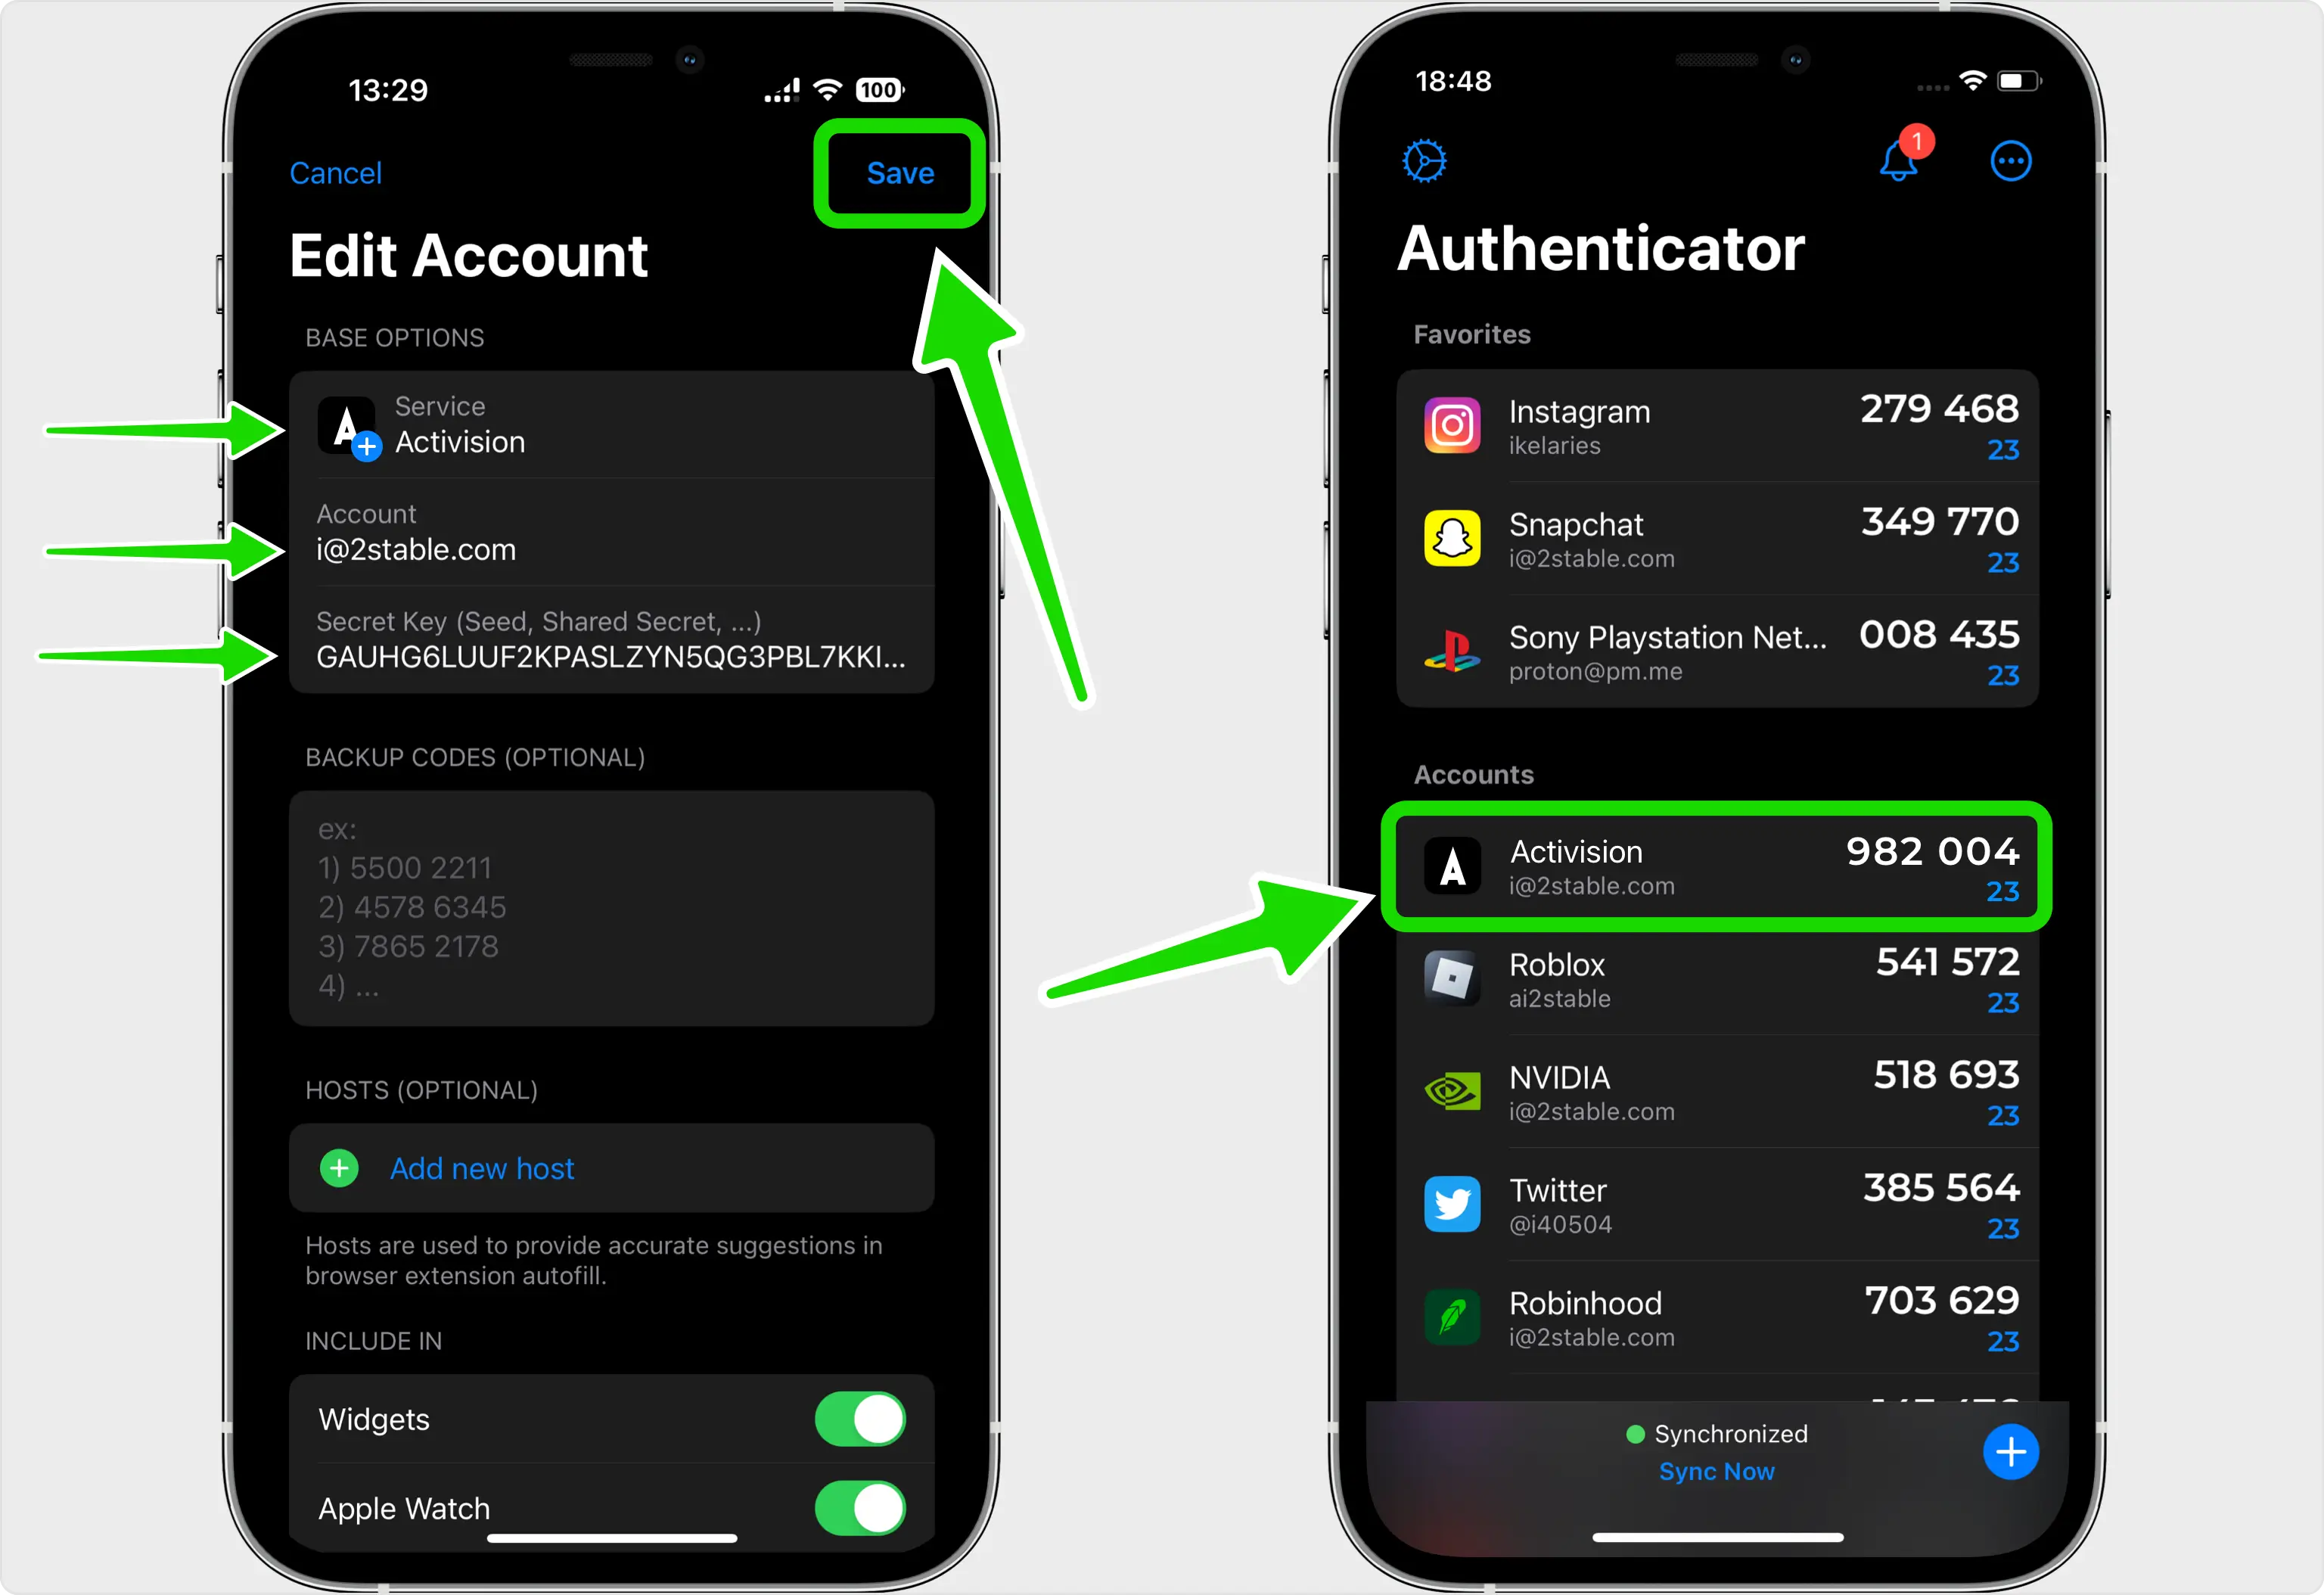
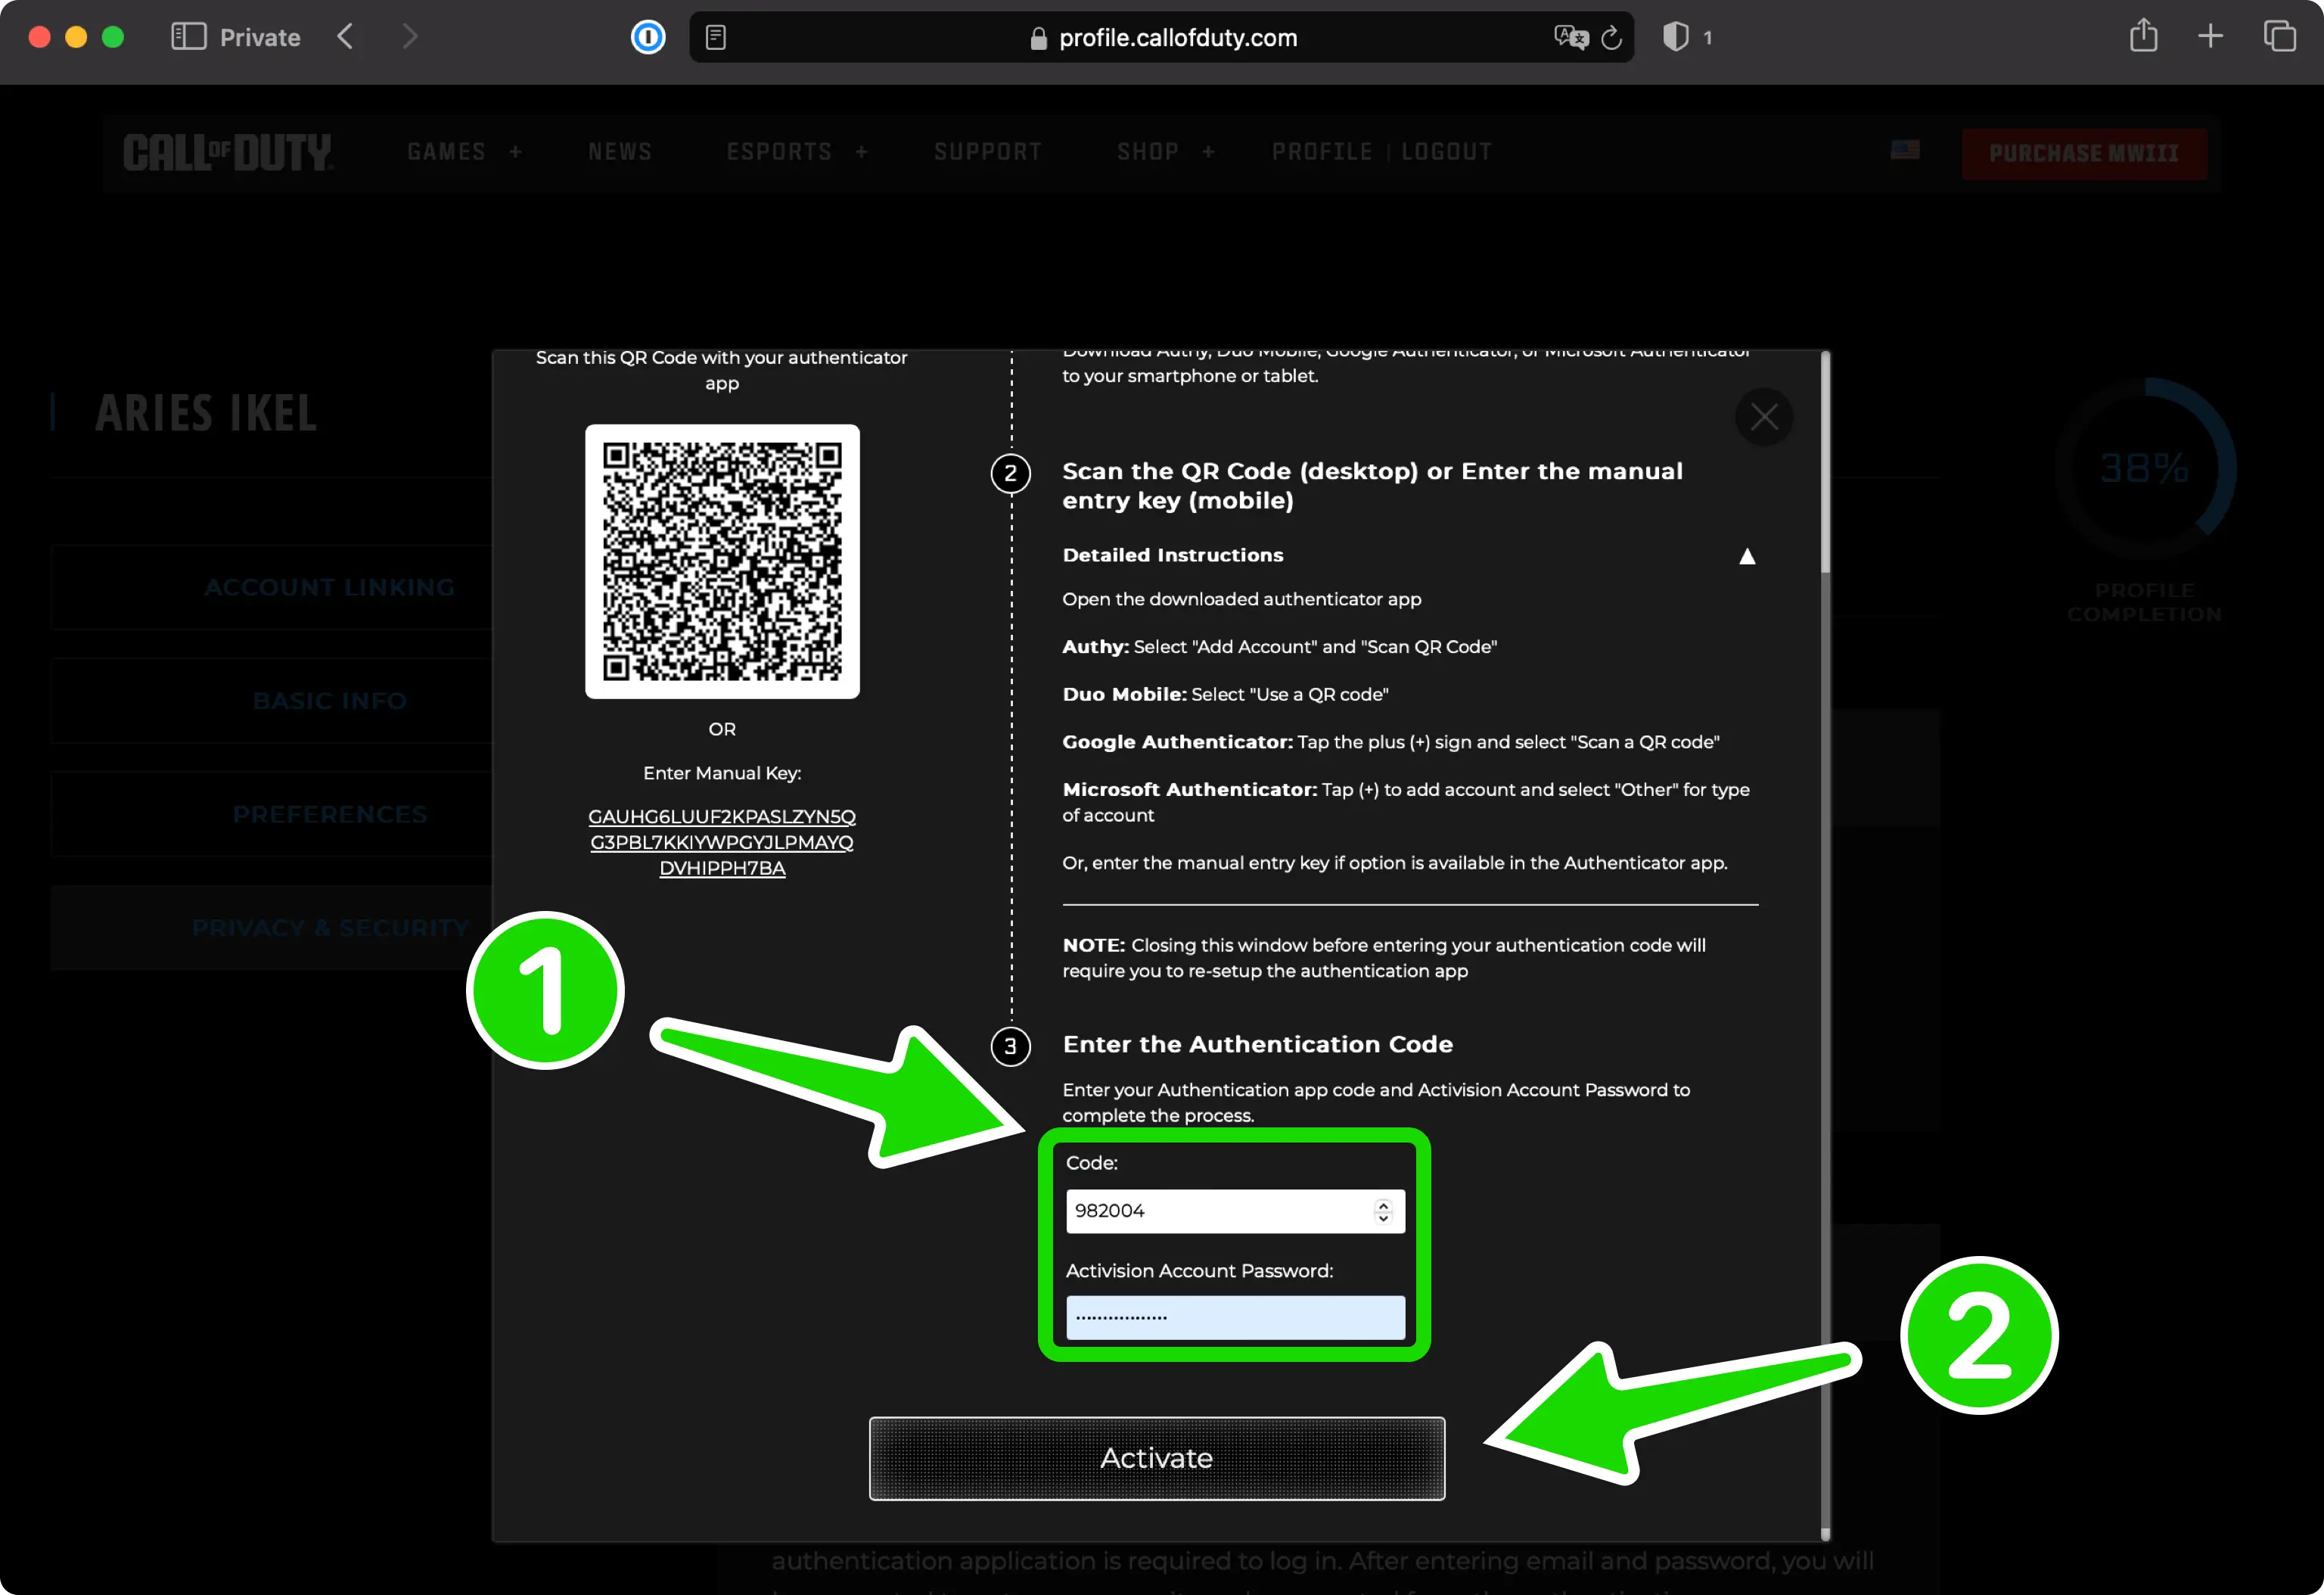
Confirm and Activate Authenticator App
Return to the Call of Duty web page. Enter the one-time code generated by the Authenticator App into the designated field, along with your Activision Account Password, to finalize the setup. Once completed, click on Activate.
Done! Warzone Authenticator App
Congratulations! You've successfully activated two-factor authentication (2FA) for added security on your Call of Duty account. Moving forward, whenever you log in, the Authenticator App will be required. Consider copying the backup codes into the app or keeping them in a secure location. Click Done to complete the process. That's it!
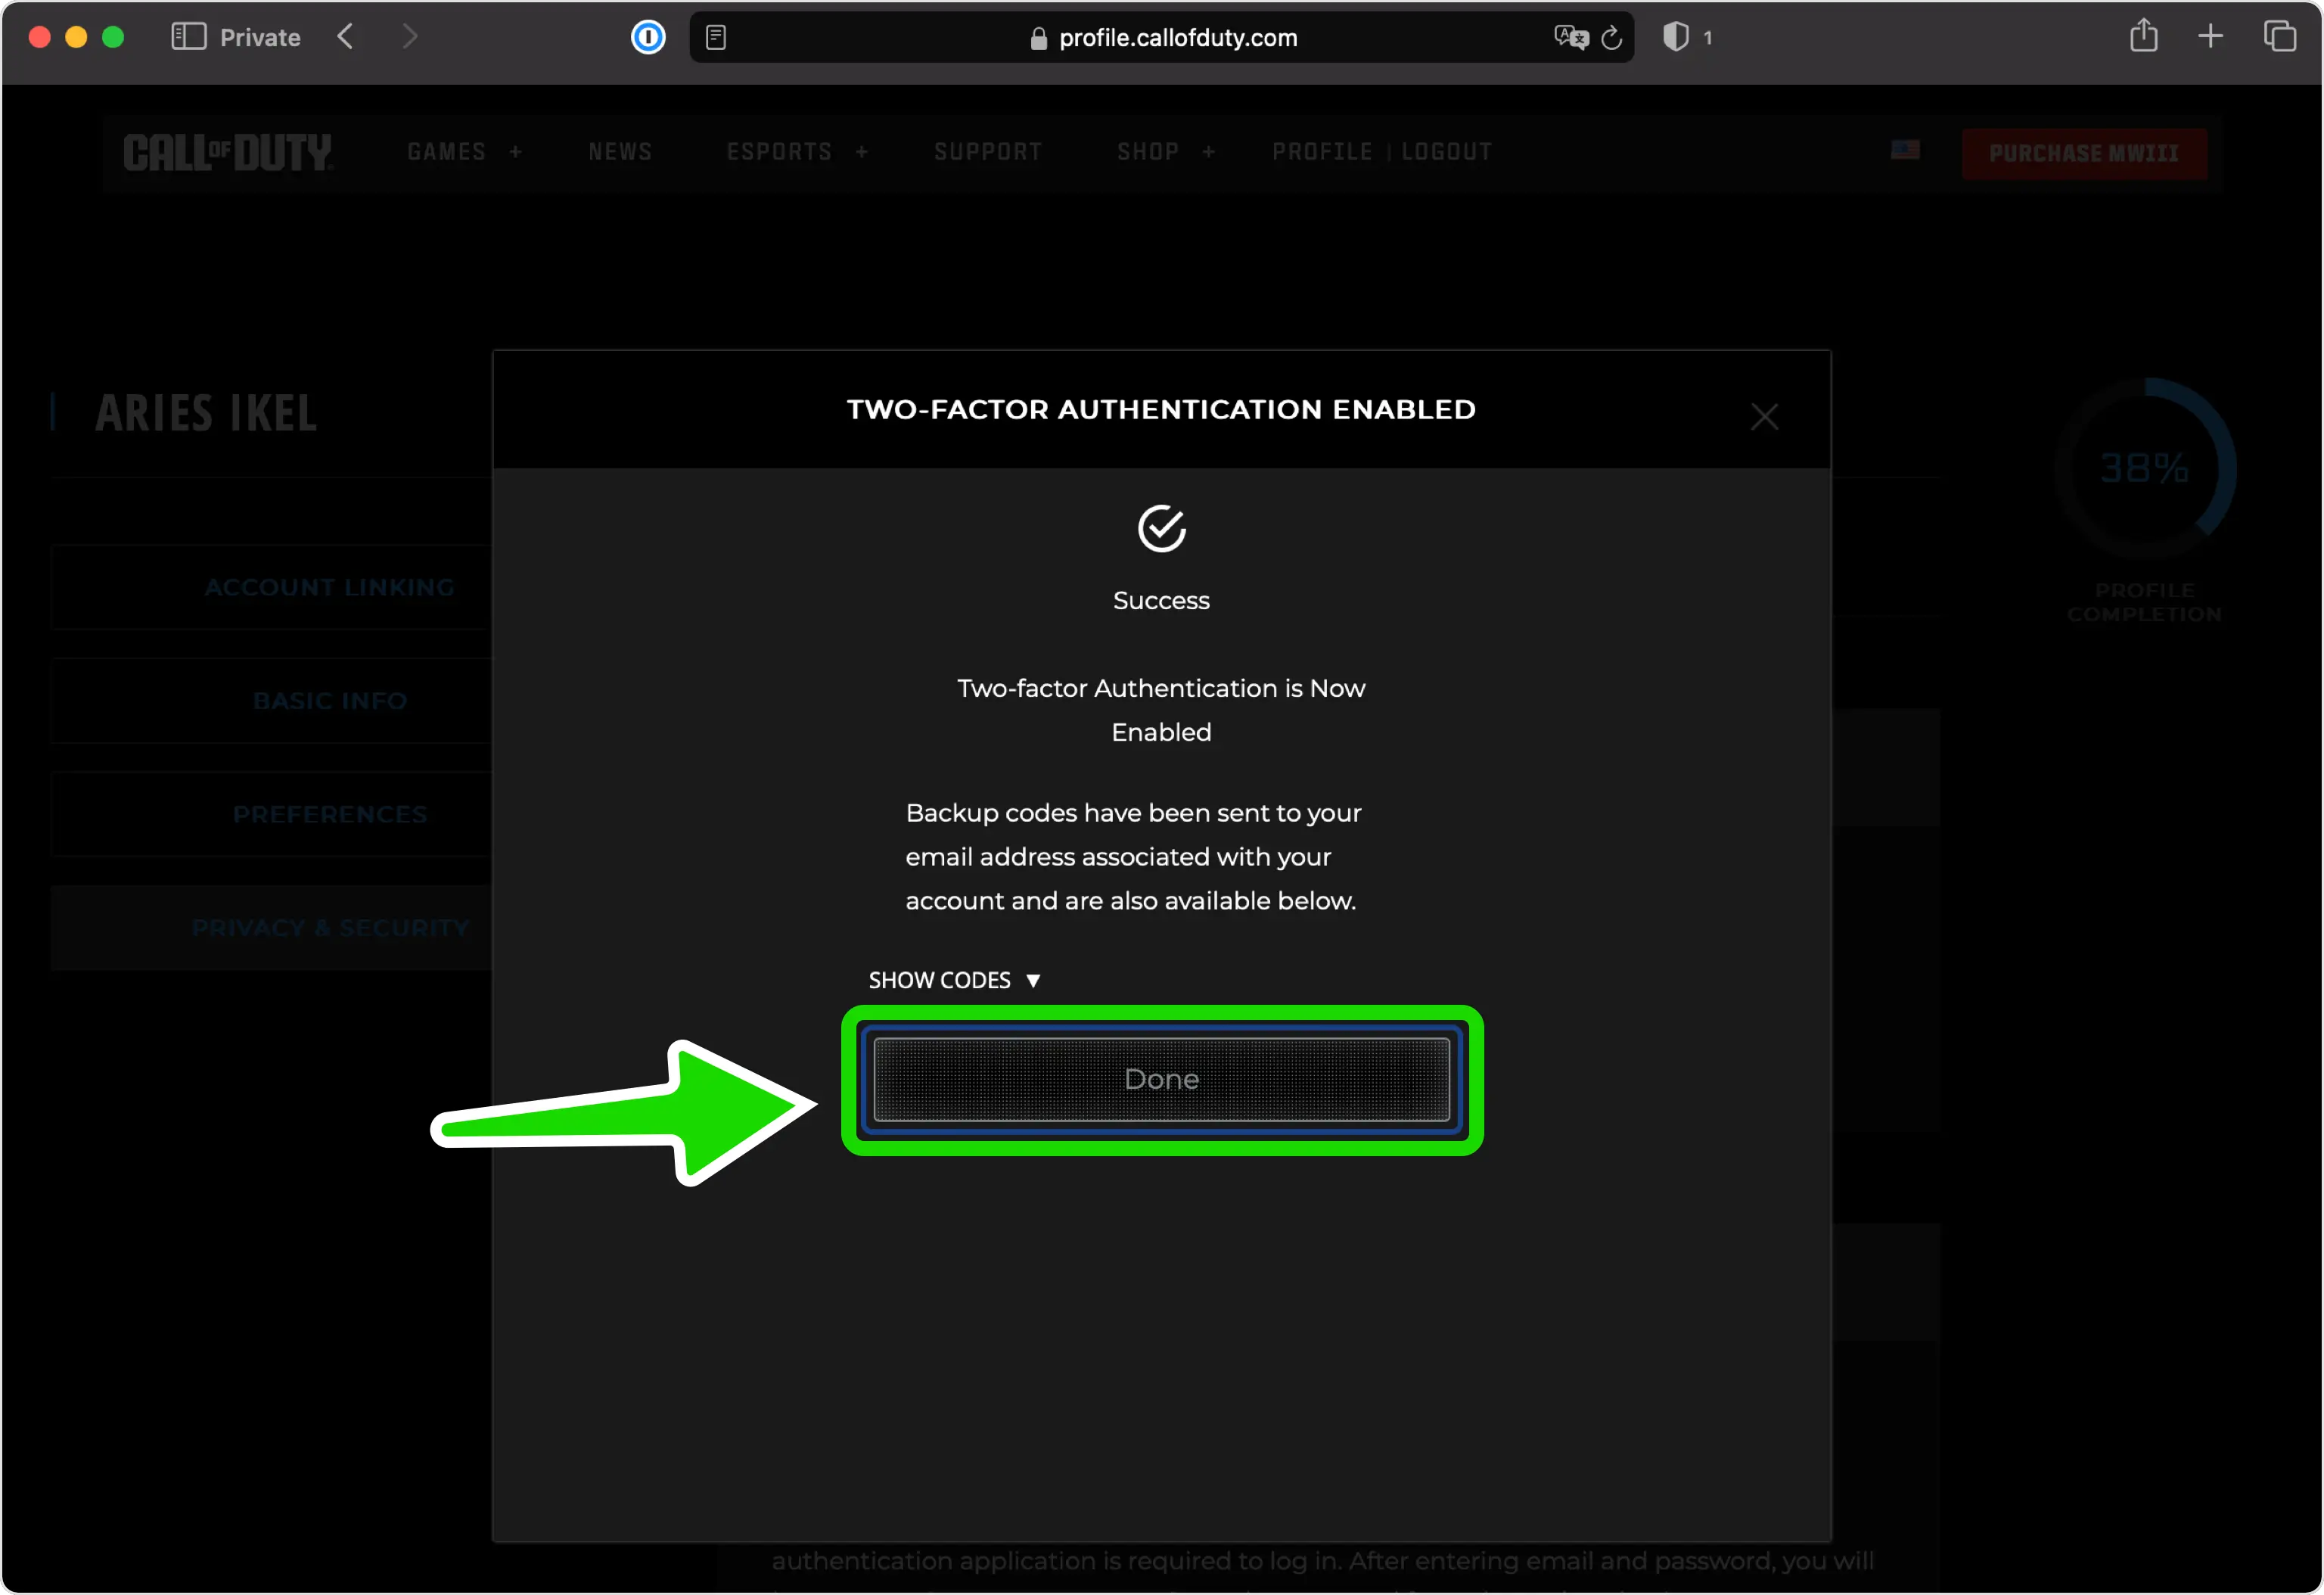
Fantastic! Your Call of Duty account is now fortified with Two-Factor Authentication (2FA). For additional details or support, feel free to explore the Call of Duty support page. Prioritize your safety and enjoy gaming with peace of mind!
Was this article helpful?
Here are some more articles you might like to read next:


