
How to enable two-factor authentication (2FA for short) for Twitter
![]() by Kevin Archer·Updated 01 Oct 2024·3 minutes to read
by Kevin Archer·Updated 01 Oct 2024·3 minutes to read
Download Authenticator App
Before we start, download Twitter Authenticator App by searching for it in your Apple device's App Store or click on the button below Download on the App Store

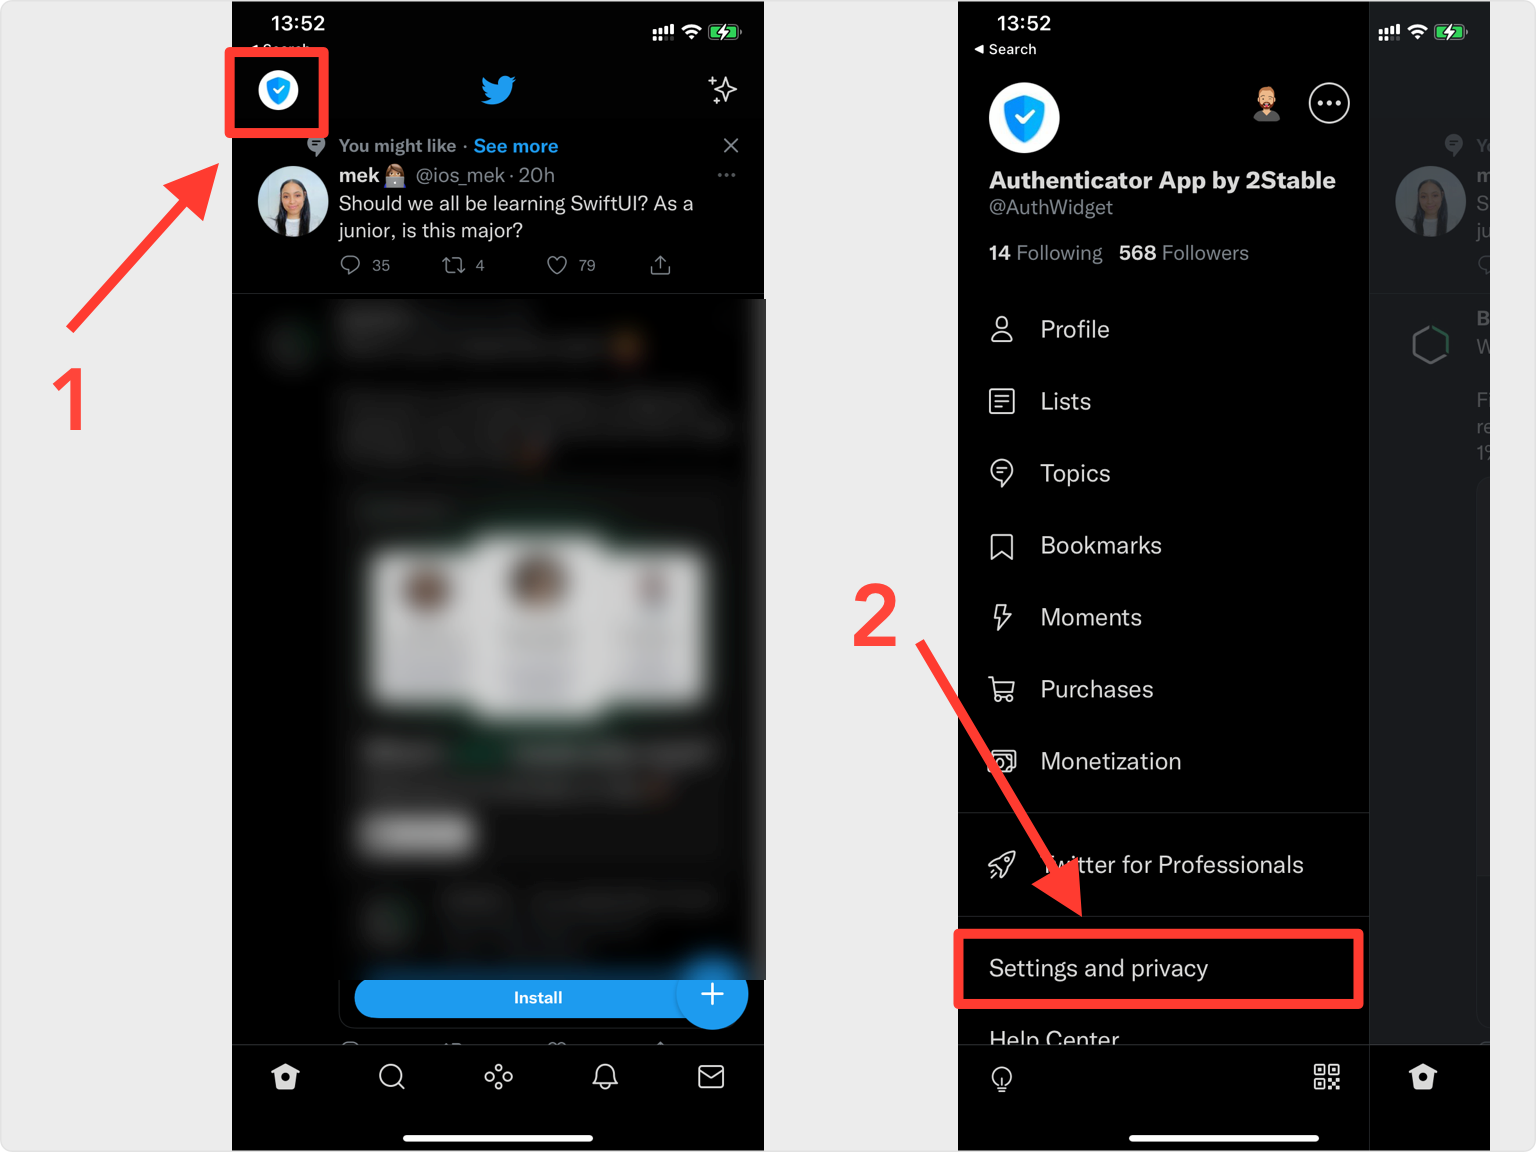
Locate 2FA Settings
Log into your Twitter account and click Profile -> Settings and privacy, from the drop-down menu.
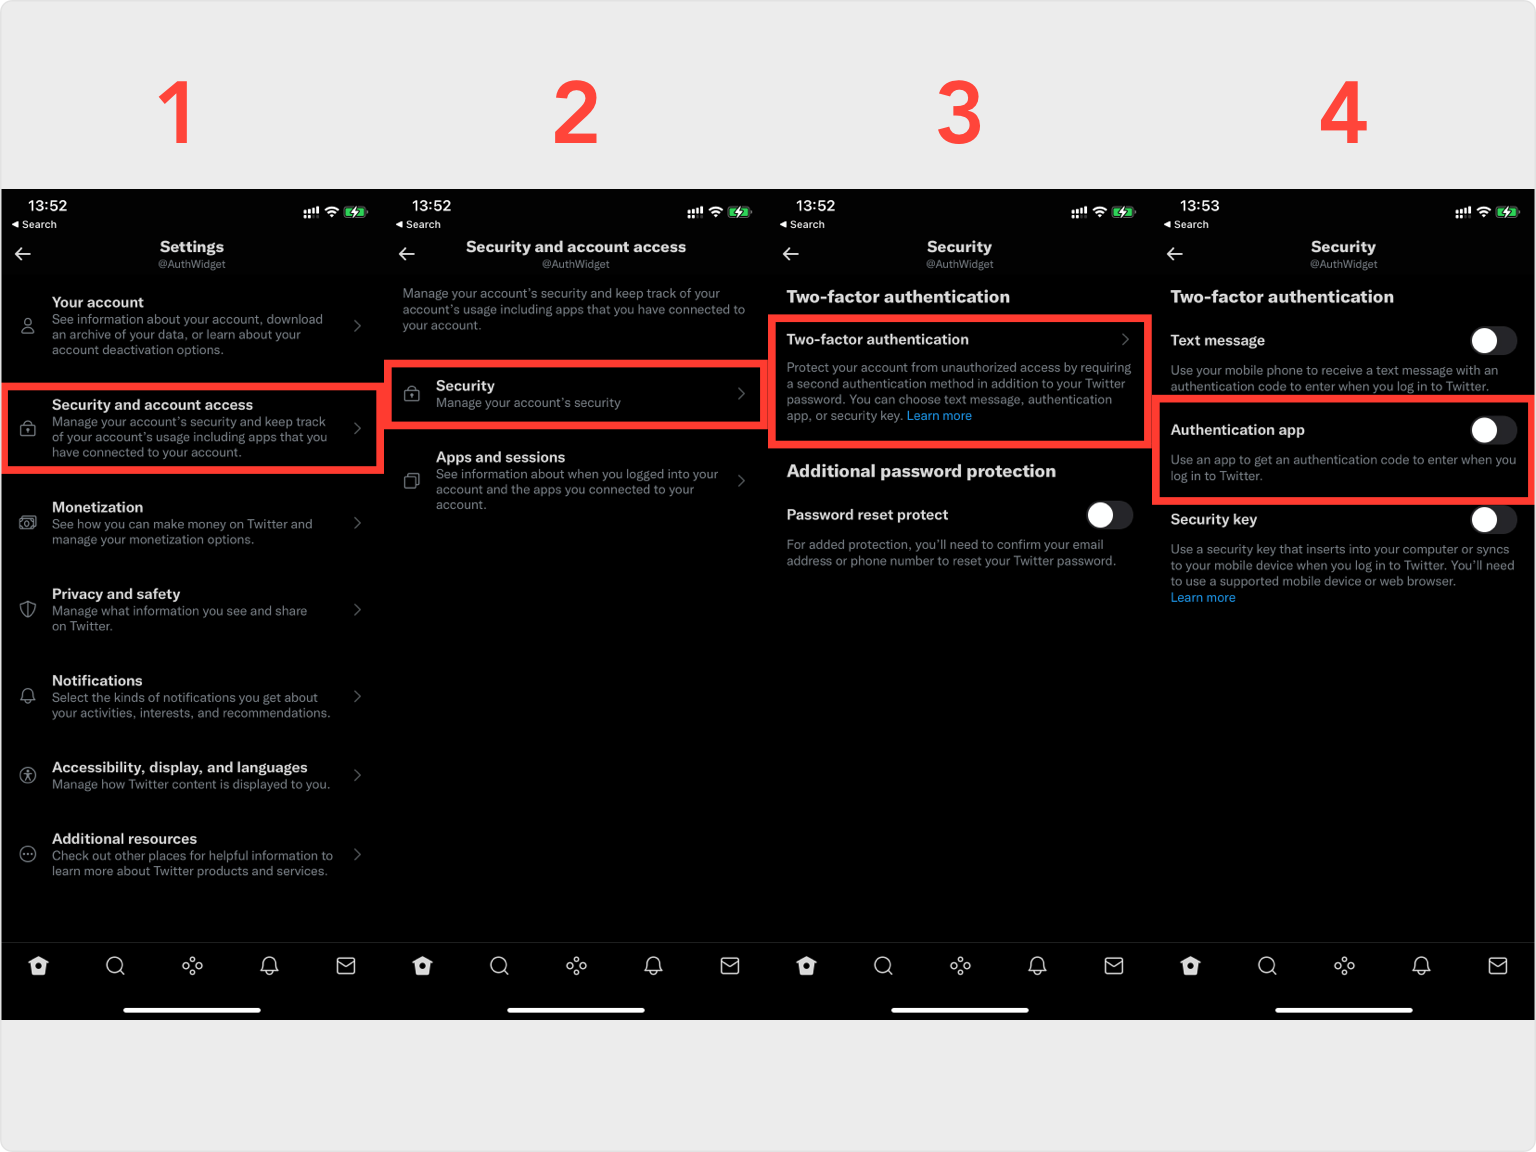
Two-Factor Authentication
Move through the next screens by tapping: Security and account access --> Security --> Two-factor authentication. Finally, enable Authentication app.
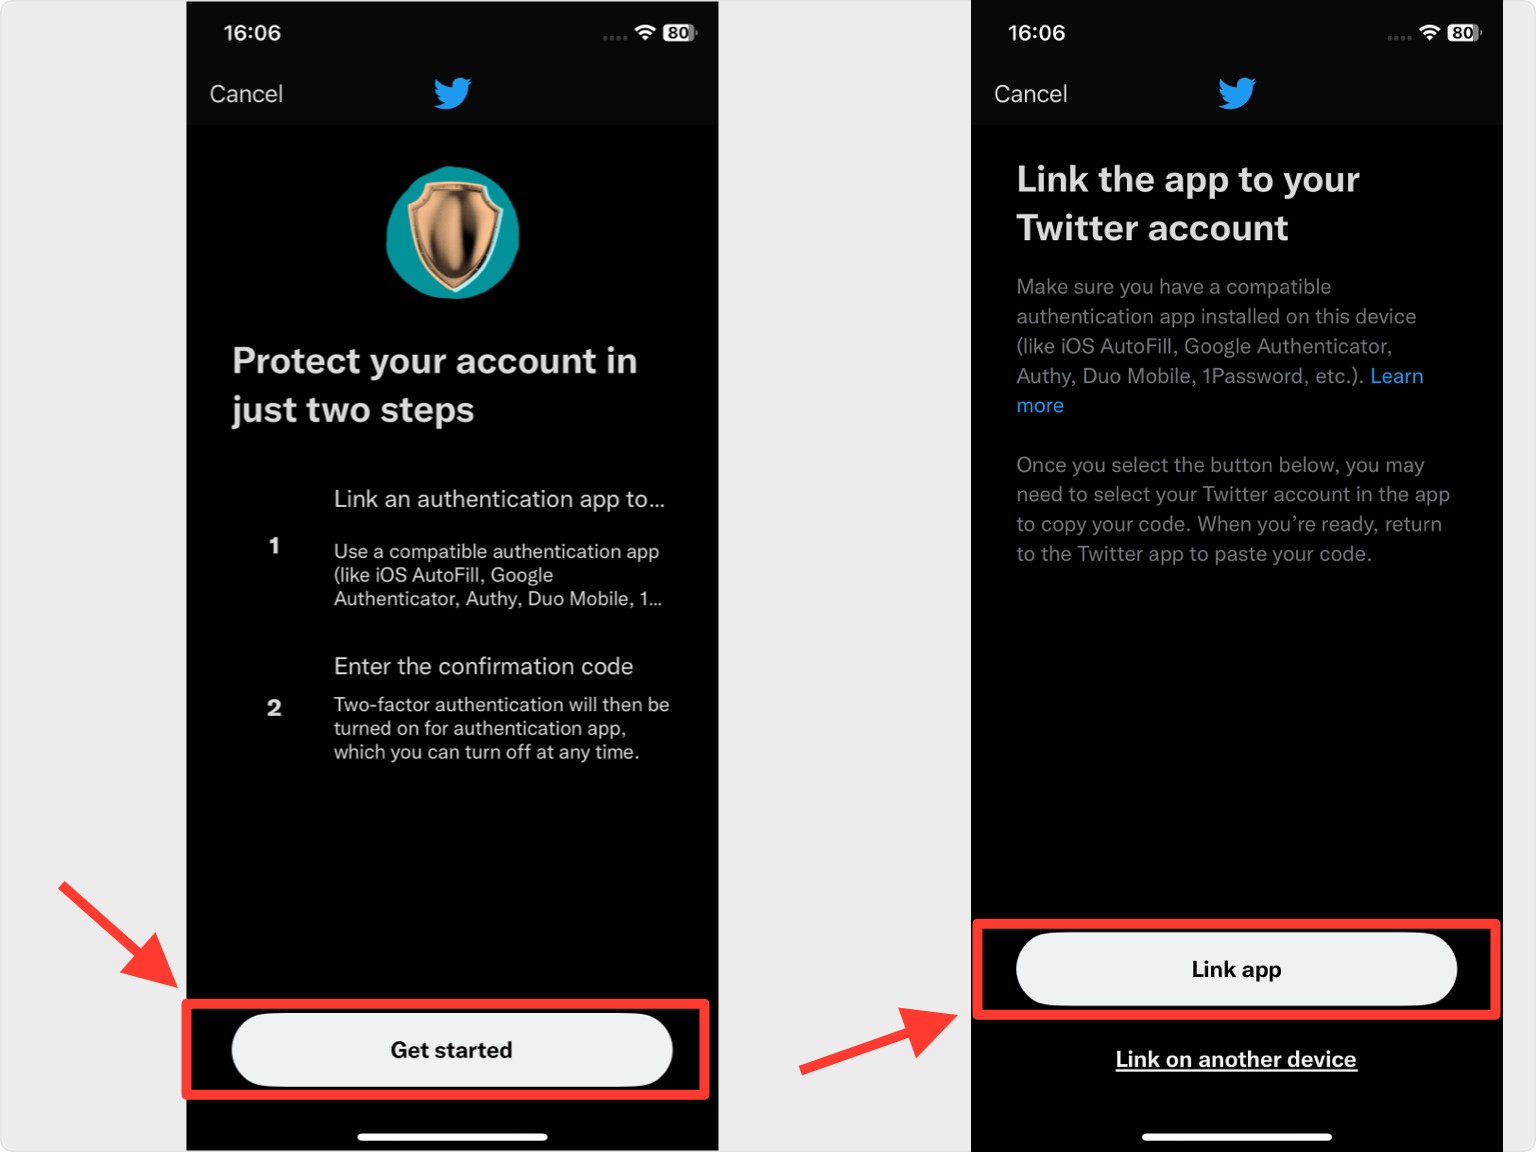
Setup 2FA
Tap on Get started, after, choose Link app.
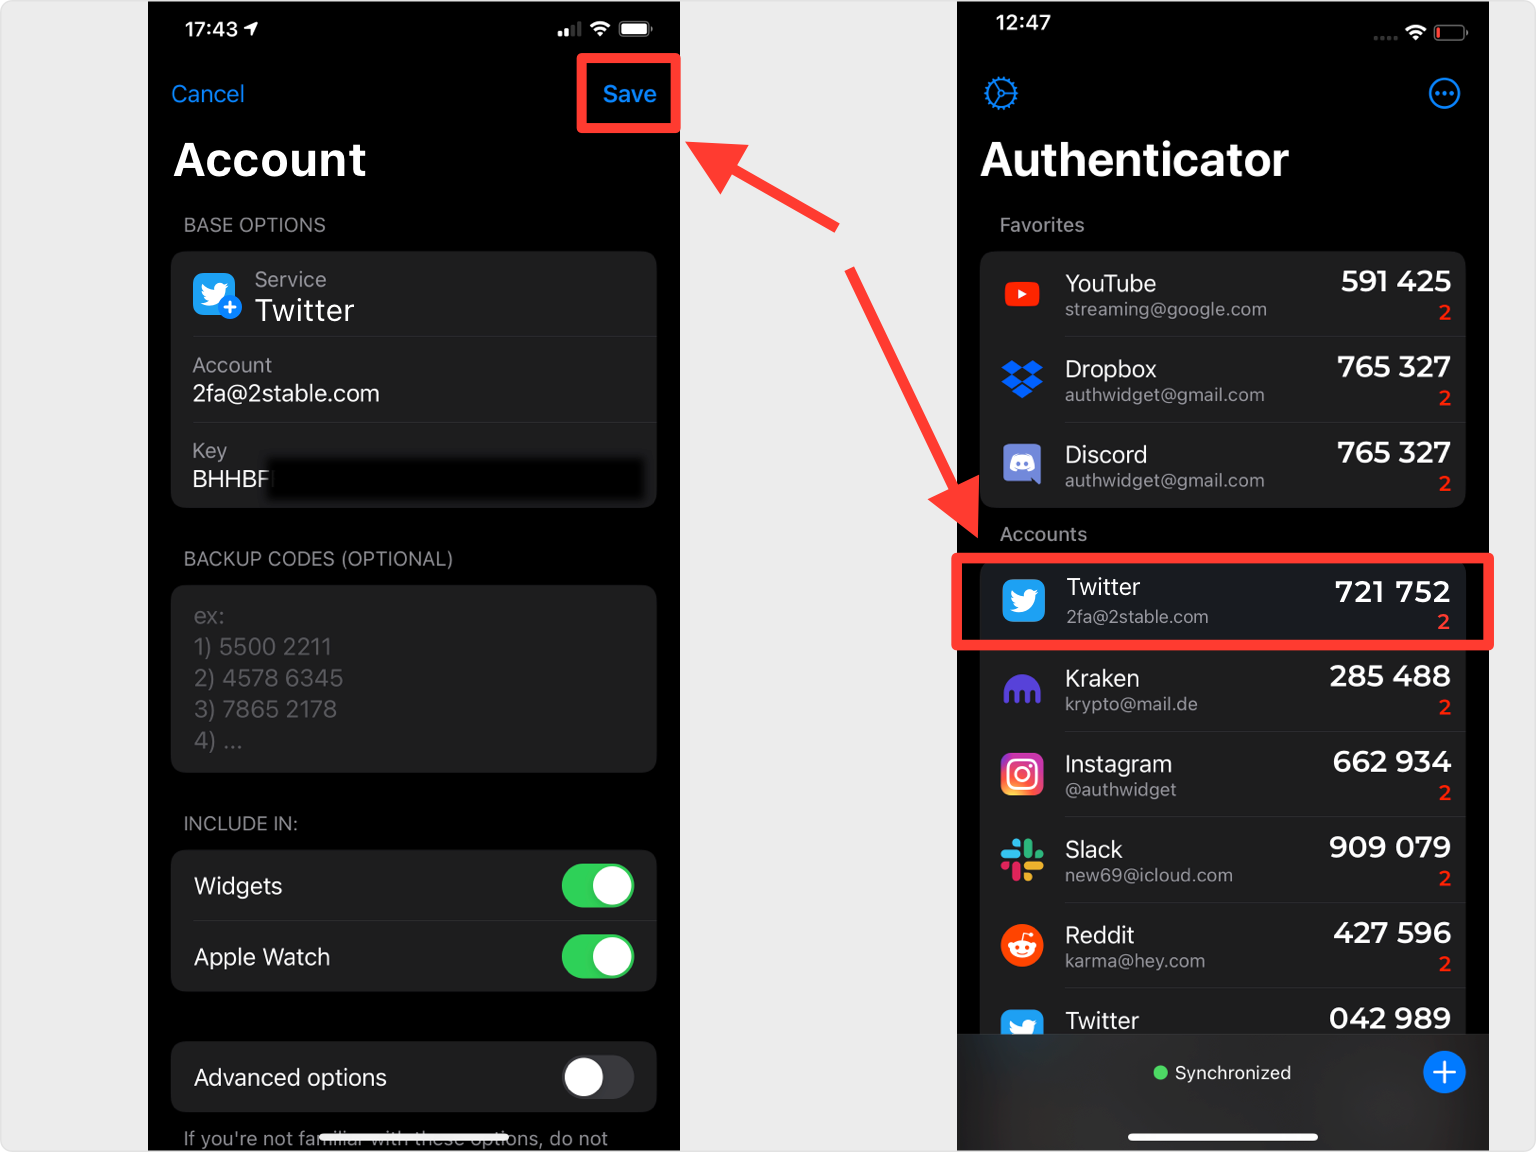
Save Account
Authenticator App will automatically choose the Twitter logo and autofill account name and secret key. Confirm it's correct by clicking Save. Then copy the numerical token provided for Instagram
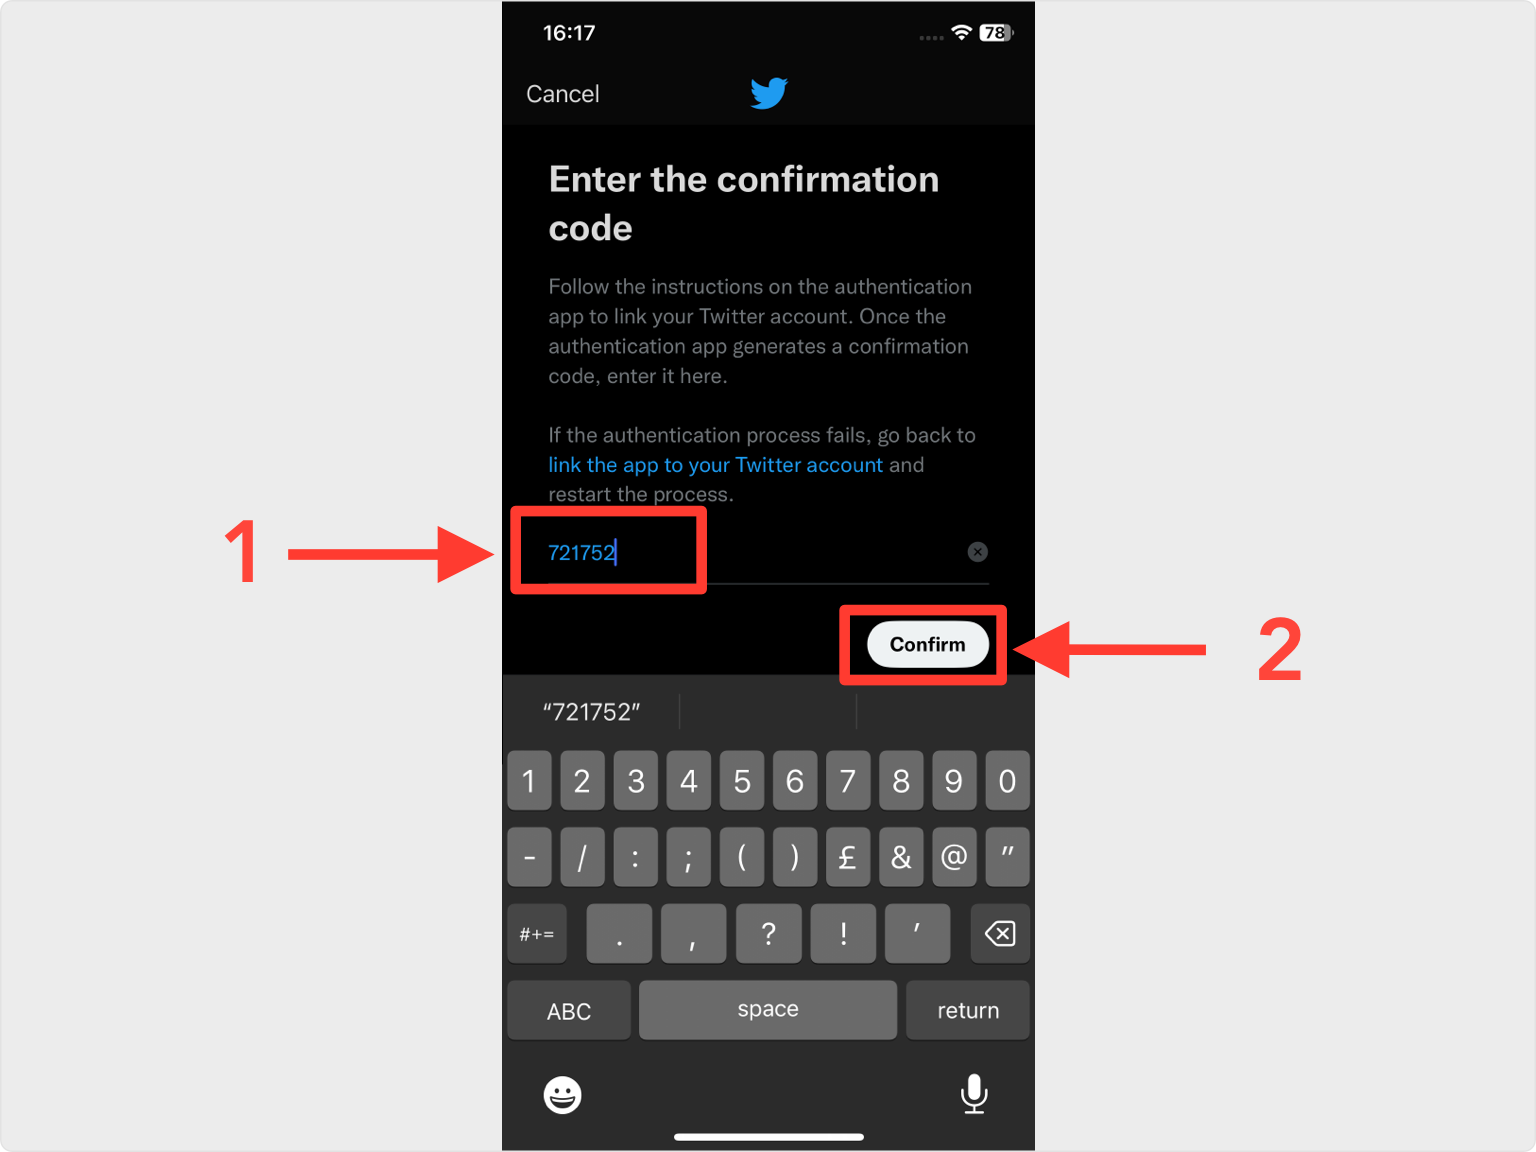
Confirm Code
Return to the Twitter app and enter the code generated by Authenticator App in the appropriate field, then tap Confirm.
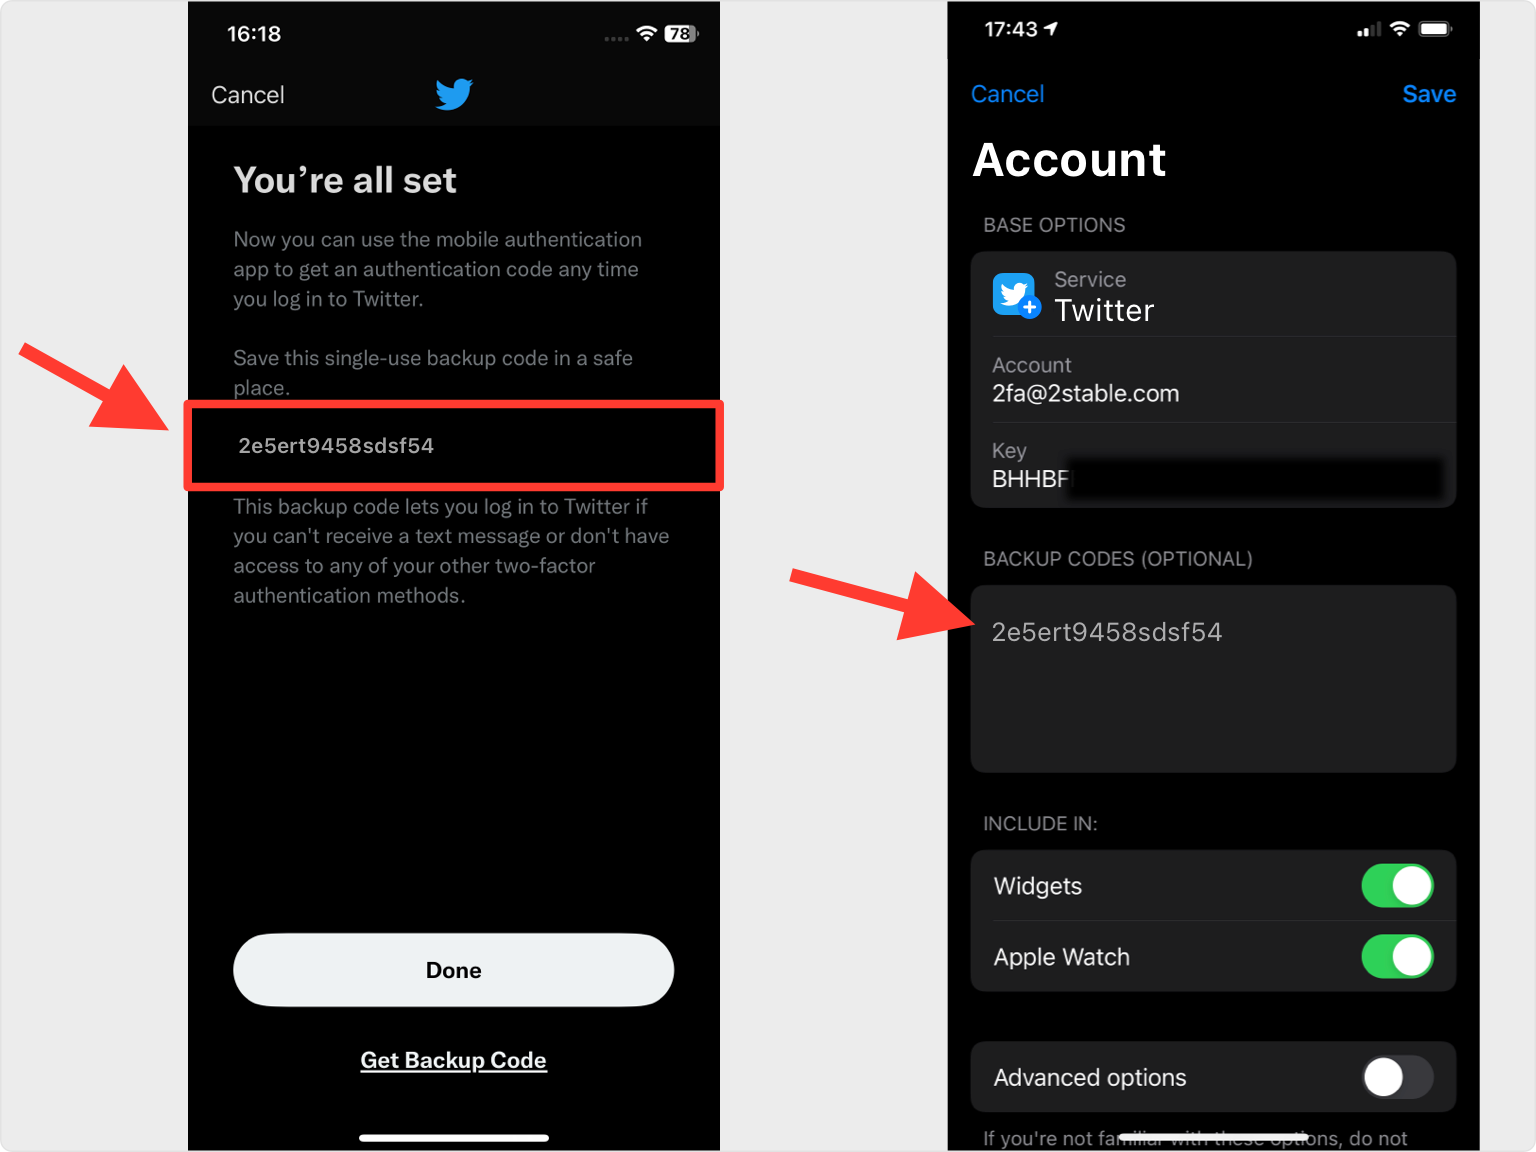
Save your Backup Code!
Your Twitter account is now protected with an extra layer of security. You can copy the backup code into Authenticator or save it in the photo gallery, no matter where you gonna save it, the most important is to store the backup code in a safe place. Press Done and that's all.
You're all set! You've enabled Two-Factor Authentication (2FA) for your Twitter account. To learn more, visit the Twitter support page. Stay safe!
Was this article helpful?
Here are some more articles you might like to read next:


